Mobile Manipulation
Warning
To-date the Gen3 Lite arm has only been tested on Dingo-D; while the Dingo-O is technically capable of supporting it, there may be additional configuration steps & debugging needed.
The Dingo-O and Dingo-D can support a Kinova Gen3 Lite 6-DOF arm. This section explains how to add the arm to your robot and install the appropriate drivers.
Physical Installation
First, power off the robot and install the arm. The arm’s power regulator can be placed inside one of the extra payload bays on the Dingo-O. On Dingo-D the power regulator must be mounted to the outside of the robot.

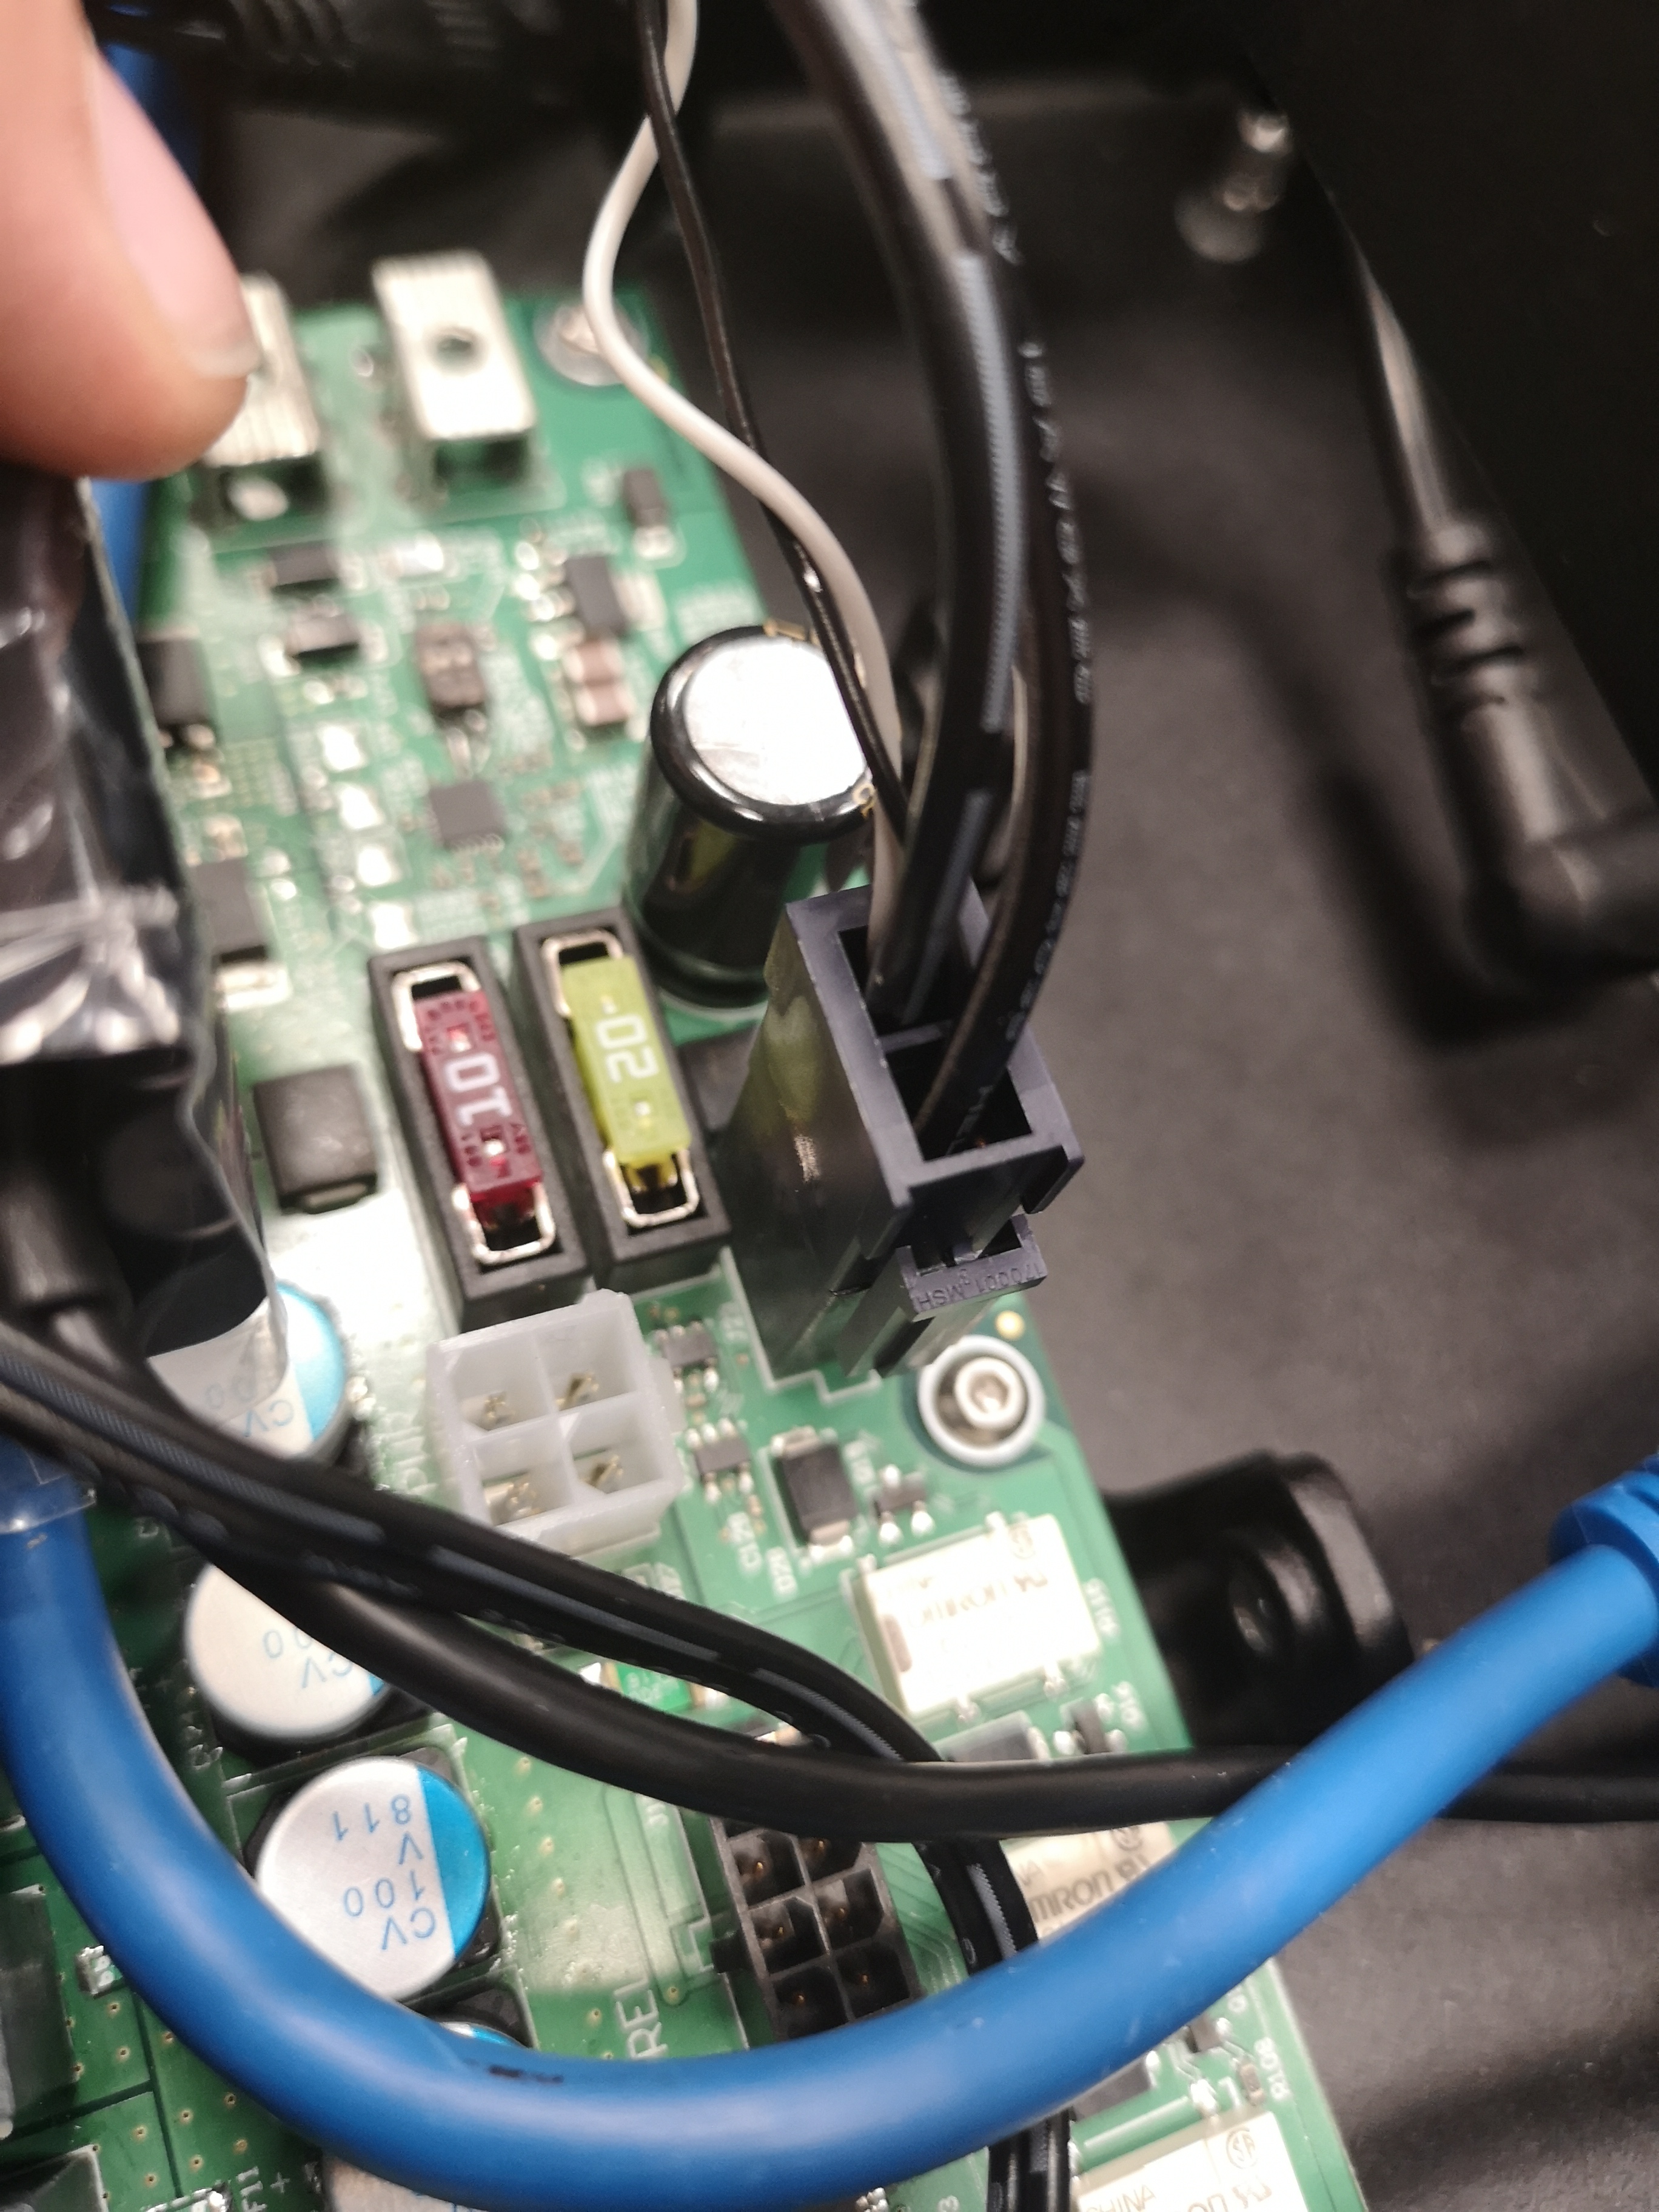
Connect the input power to the Gen3 Lite’s power regulator to the VBAT connector on Dingo’s MCU:
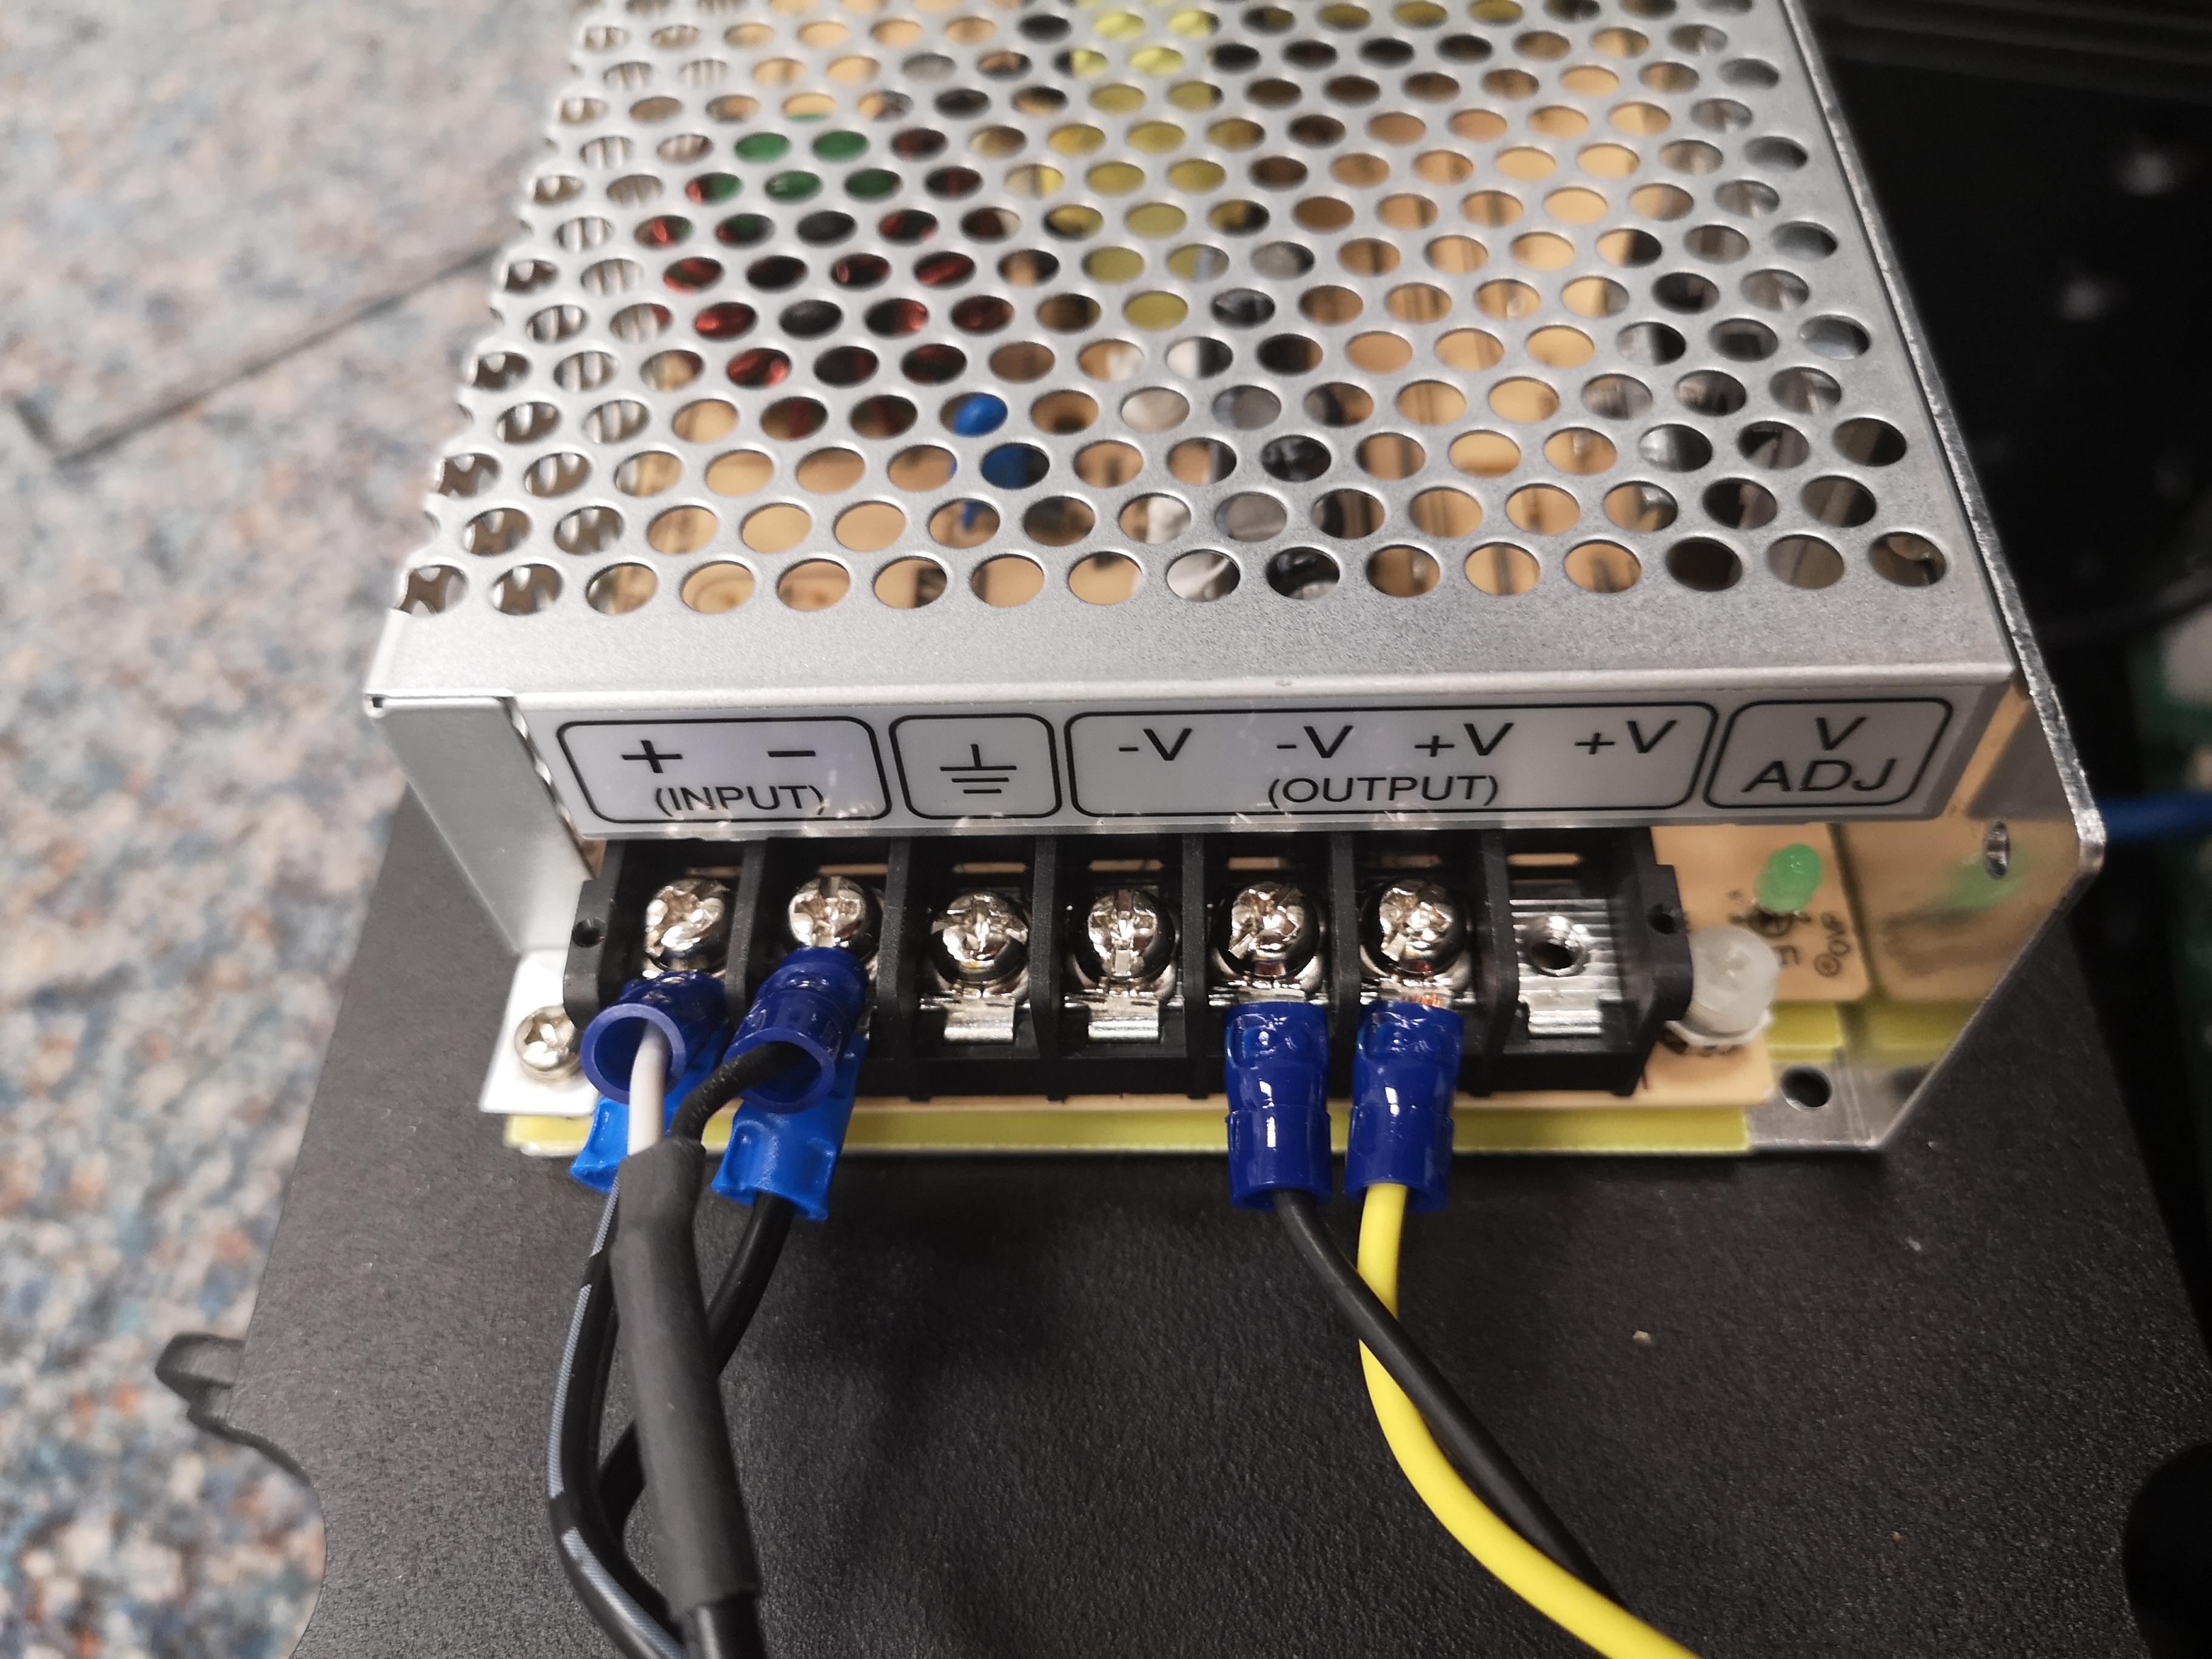
Connect the output power from the Gen3 Lite’s power cable.
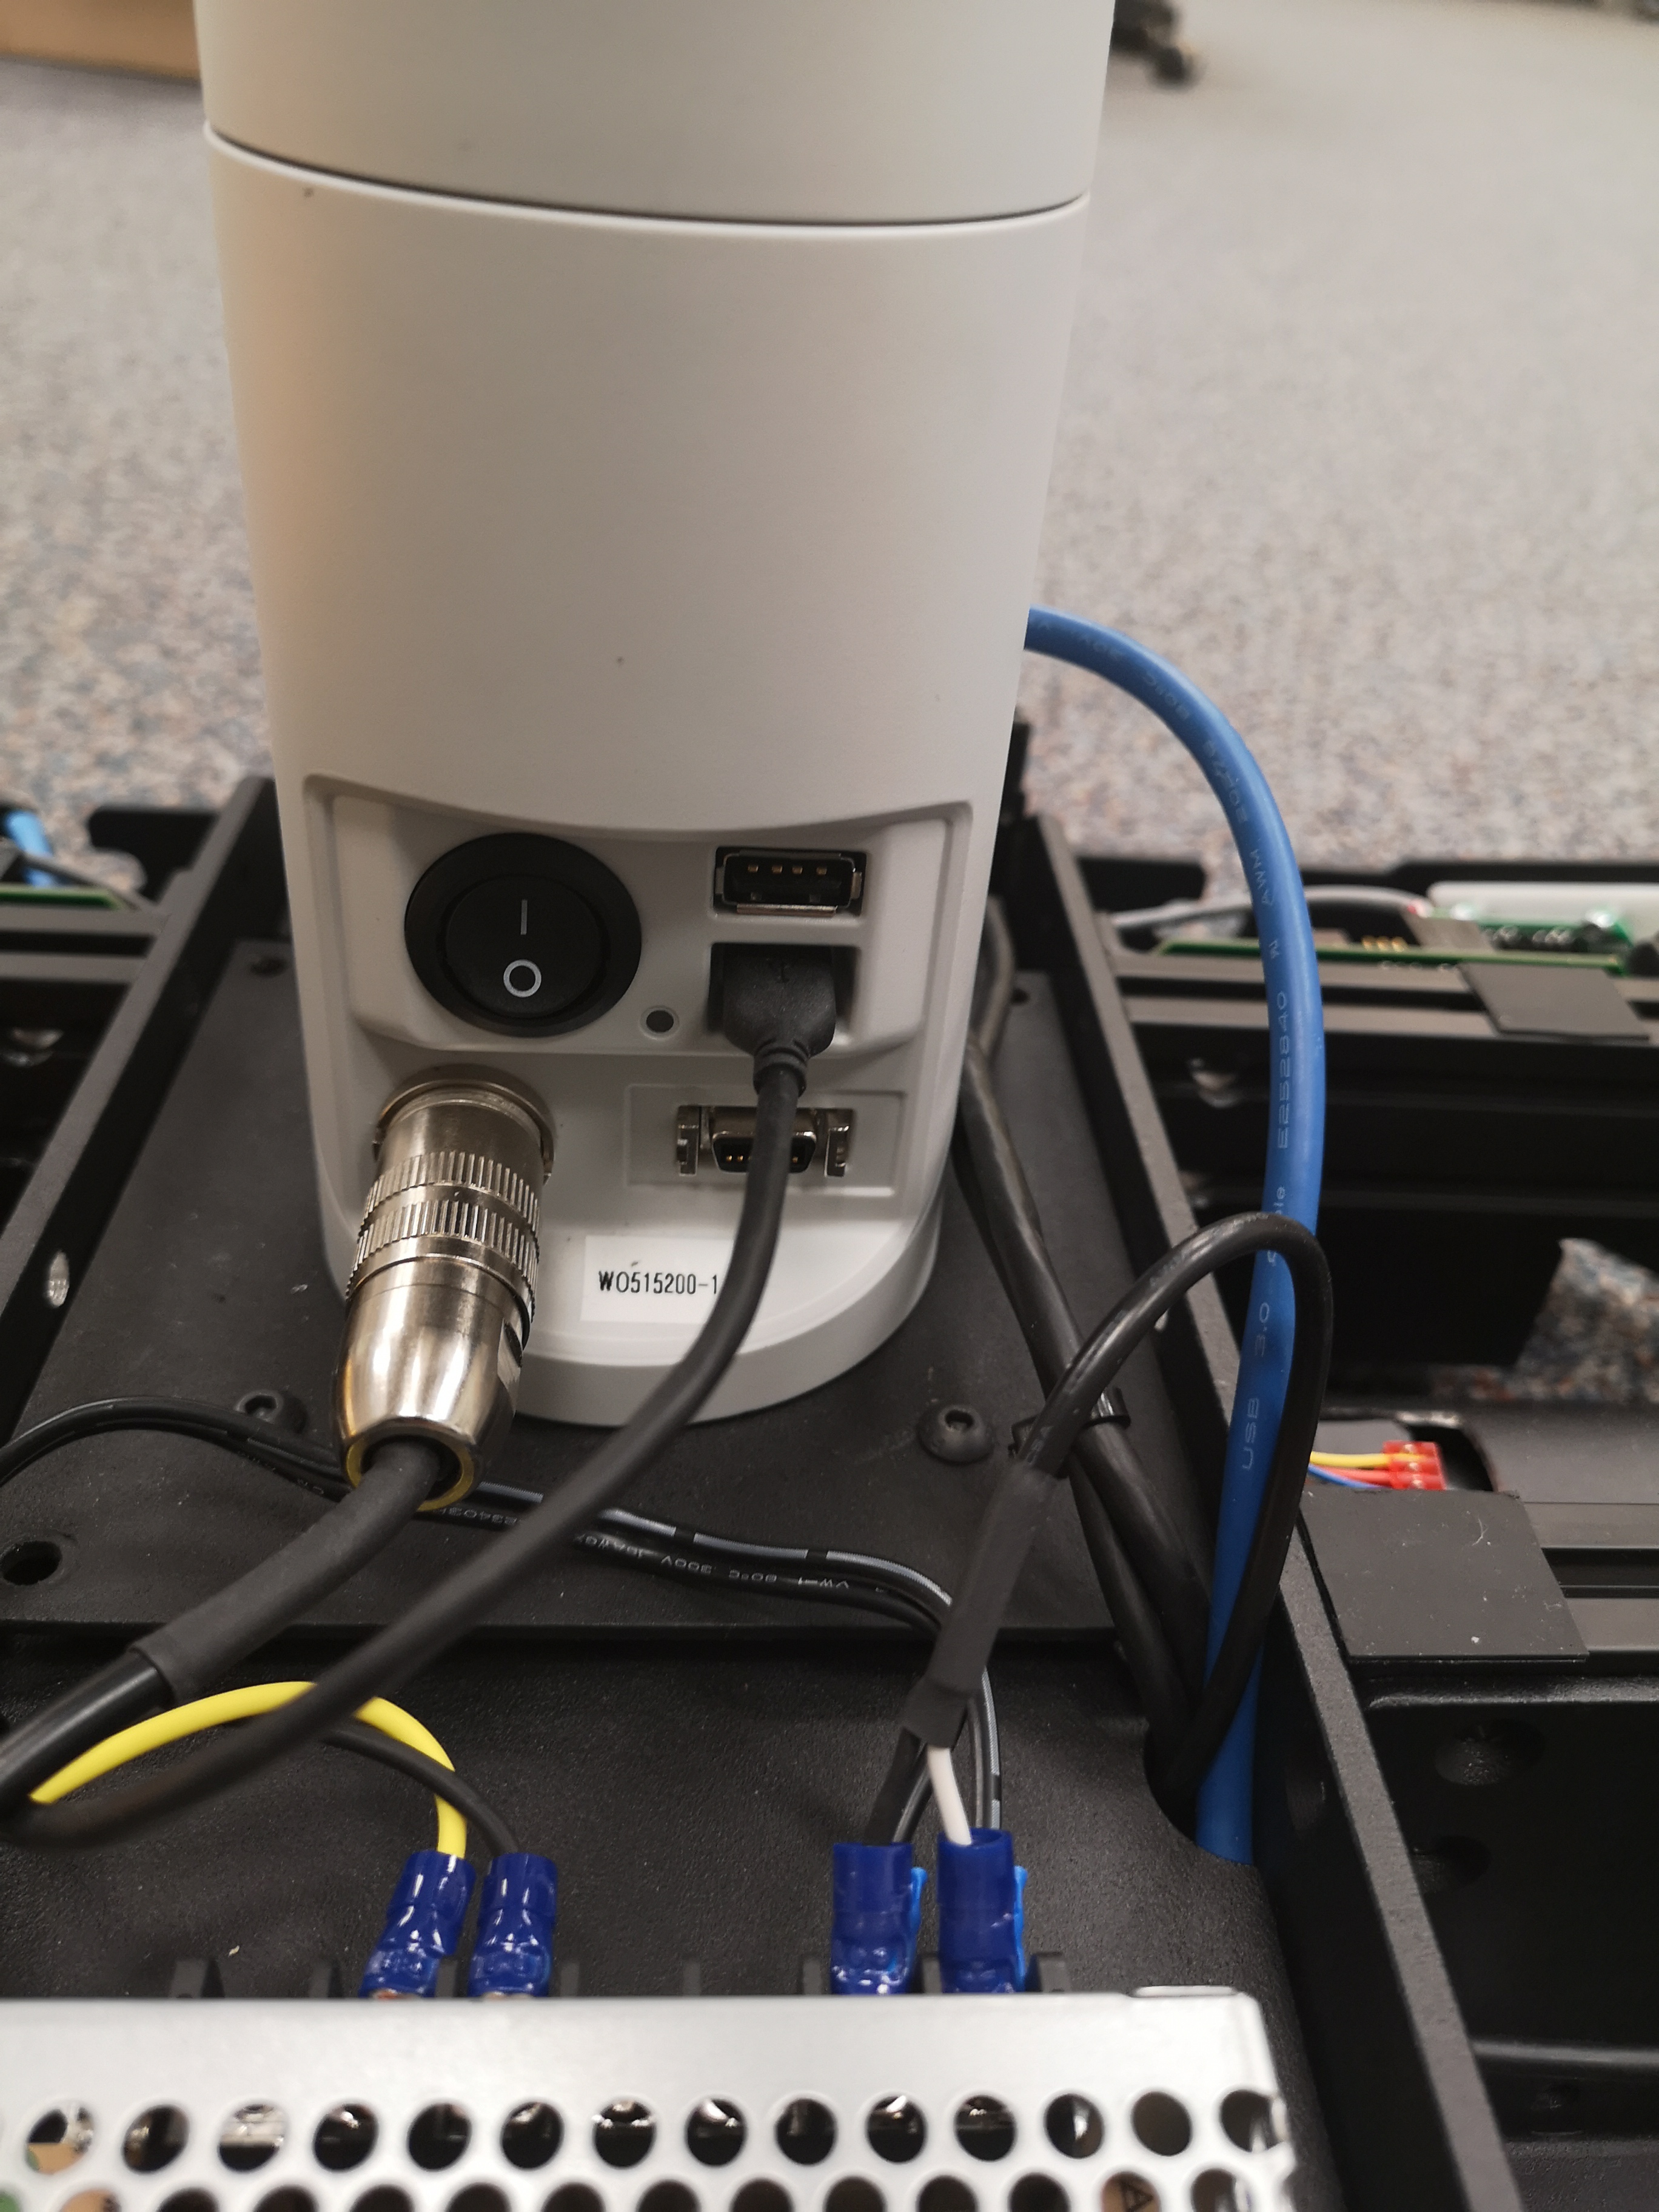
Connect the MicroUSB port of the Gen3 Lite to an open USB port on the Dingo’s computer and connect the Gen3 Lite’s power cable to the port on the arm’s base.
Network Confguration
The Kinova Gen3 Lite does not support configuring the IP address of the arm; the arm always communicates via
ethernet-over-USB with address 192.168.1.10. To configure Dingo to communicate with the arm, first connect the
micro-USB cable between the arm and an empty USB port on your robot’s PC. Run dmesg – you should see the USB
connection identified as an ethernet device and assigned a network device identifier like usb0,
enx8c04ba888725` or ``enp0s20u9 – the exact ID will vary based on the motherboard and the OS configuration.
Modify /etc/network/interfaces to add the USB ethernet device to the br0 bridge, for example, if the device
showed up as usb0:
bridge_ports regex (eth.*)|(en.*)|(usb.*)
Then add a new interface to the bridge by adding this to the same file:
# Static interface for communicating with the Gen3 Lite arm
auto br0:1
allow-hotplug br0:1
iface br0:1 inet static
  address 192.168.1.1
  netmask  255.255.255.0
Driver Installation
Create a catkin workspace and clone the dingo_manipulation and ros_kortex packages into it:
mkdir -p ~/catkin_ws/src
cd ~/catkin_ws
catkin_init_workspace src
cd src
git clone https://github.com/dingo-cpr/dingo_manipulation
git clone https://github.com/Kinovarobotics/ros_kortex
The ros_kortex package requires additional steps before it can be built:
sudo apt install python3 python3-pip
sudo python3 -m pip install conan
conan config set general.revisions_enabled=1
conan profile new default --detect > /dev/null
conan profile update settings.compiler.libcxx=libstdc++11 default
Install any additional necessary ROS dependencies:
cd ~/catkin_ws
rosdep install --from-paths src --ignore-src -r -y
Finally build the packages. ros_kortex can take a very long time to build. This is normal.
cd ~/catkin_ws
catkin_make
If your Dingo has a Jetson computer you need to specify additional parameters to build ros_kortex:
catkin_make --cmake-args -DCONAN_TARGET_PLATFORM=jetson
Once everything is built remember to source your workspace: source $HOME/catkin_ws/devel/setup.bash.
URDF Configuration
Next you must add the arm to your robot’s URDF. The easiest way to do this is to use the DINGO_URDF_EXTRAS
environment variable. Edit /etc/ros/setup.bash and add the following to the end of it:
# source the catkin workspace; edit this path as necessary for your robot
source /home/administrator/catkin_ws/devel/setup.bash

# add the gen3 lite description to the URDF
export DINGO_URDF_EXTRAS=$(catkin_find dingo_kinova_description urdf/dingo_gen3_lite_description.urdf.xacro --first-only)
If your robot already has a DINGO_URDF_EXTRAS then simply include the dingo_gen3_lite_description.urdf.xacro
file in it:
<include filename="$(find dingo_kinova_description)/urdf/dingo_gen3_lite_description.urdf.xacro" />
This will mount the arm to the front_b_mount link on the robot’s chassis. To apply an offset and/or rotation, set
the DINGO_ARM_XYZ and DINGO_ARM_RPY environment variables. See Dingo Description
for a summary of all available environment variables. To use a different mounting location, set the DINGO_ARM_MOUNT
environment variable. The following links are defined in the Dingo-O and Dingo-D URDFs and may be used as mounting points:
Link (front to back) |
Dingo-D |
Dingo-O |
|---|---|---|
|
Yes |
Yes |
|
Yes |
Yes |
|
Yes |
Yes |
|
No |
Yes |
|
Yes |
Yes |
|
Yes |
Yes |
|
Yes |
Yes |
If your arm’s power regulator is externally mounted, as will likely be the case for Dingo-D, you may add this to the
model by setting the DINGO_ARM_EXTERNAL_POWER environment variable to 1. By default the external power will be
mounted to the rear_b_mount link.
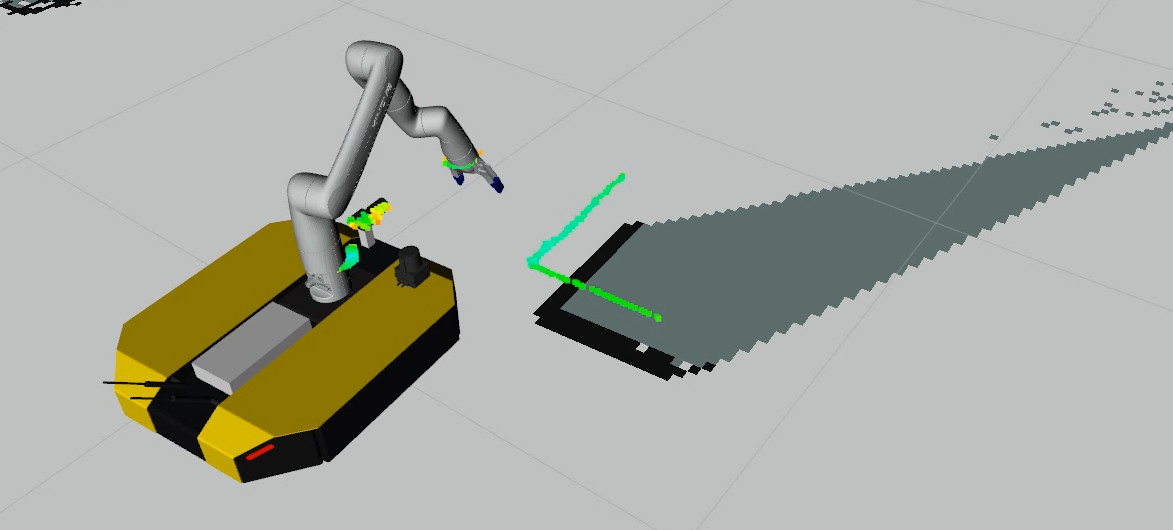
To verify that your model is correct you can use roslaunch dingo_viz view_model.launch. You should see the arm
sticking straight up in the air:

Driver Bringup & Controlling the Arm
To control the arm you must run 2 launch files: one to launch the underlying ros_kortex driver to control the
arm and the second to launch the moveit interface to allow for planning & executing commands. In two separate terminals
run the folliwing commands:
roslaunch dingo_kinova_bringup dingo_gen3_lite_bringup.launch
roslaunch dingo_gen3_lite_moveit_config dingo_gen3_lite_moveit_planning_execution.launch
To make sure everything is working, set the ROS_MASTER_URI on your computer to use the robot, and then
launch rviz:
export ROS_MASTER_URI=http://<your-robot>:11311
rviz
Note
This assumes you have configured your network correctly to allow remote rviz connections
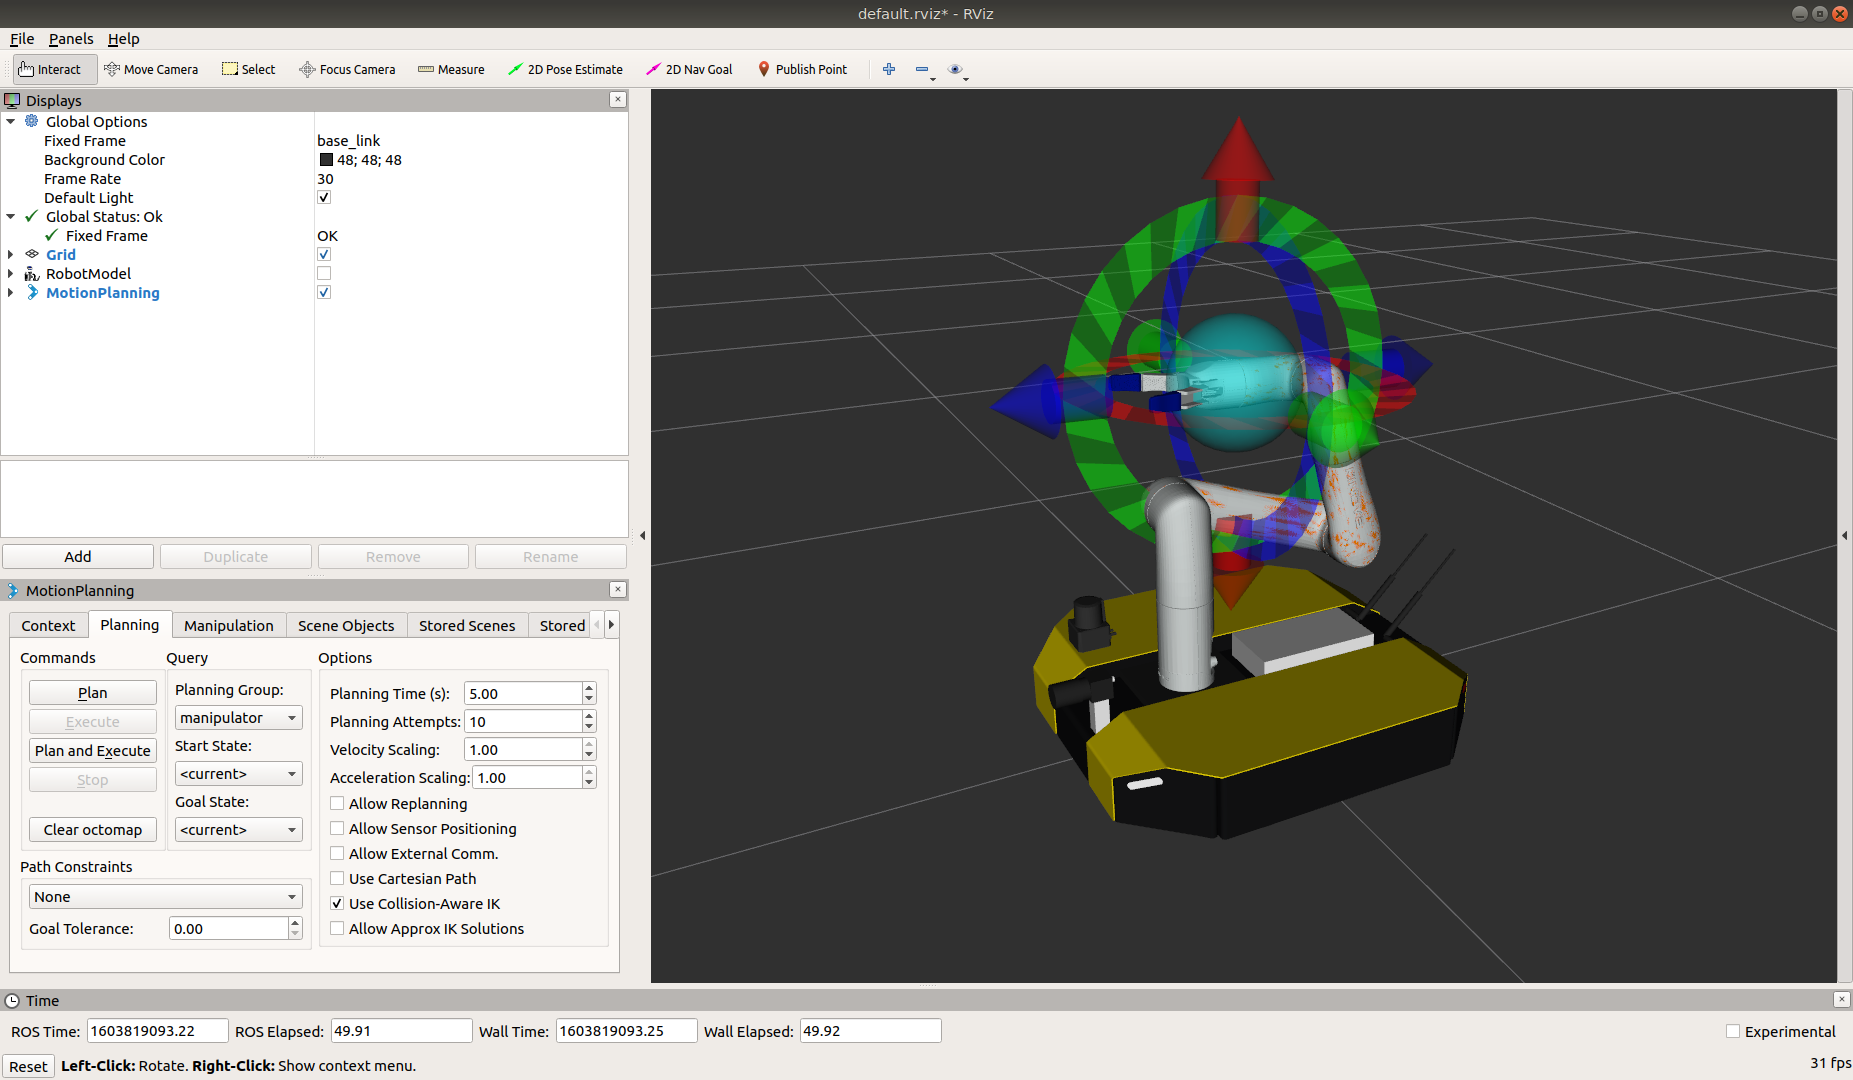
In rviz, add the Mobile Manipulation topic. After a moment you should see the robot with the arm in its current state.
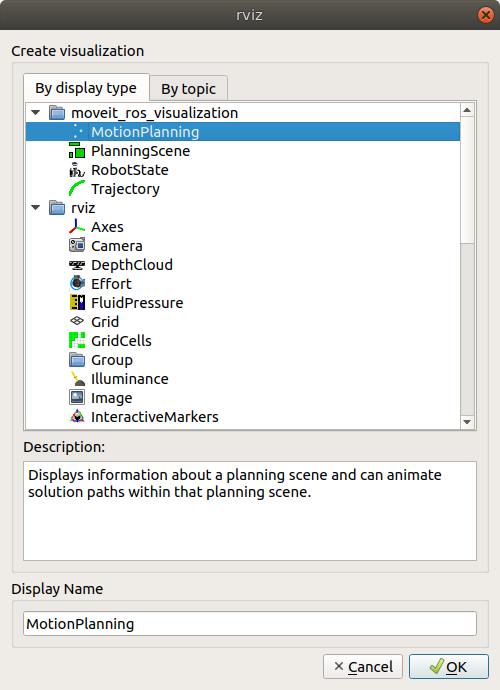
Use the spherical control to move the arm to a new position and press the “plan and execute” button. You should see the arm move from its current state to the desired goal.
The dingo_gen3_lite_moveit_config package includes 2 default poses for the arm: vertical which sets all the
joint positions to 0 (which will point the arm straight up in the air) and stow which will fold the arm up into
a safe, compact position for travel. Additional poses can be created by running
roslaunch dingo_gen3_lite_moveit_config setup_assistant.launch
Refer to the dingo_manipulation documentation on GitHub for more information on adding additional static poses.
Appendix: Additional Customization
The default driver bringup assumes that the robot is in a mostly-stock state. It is possible that your robot includes additional sensors and payloads that the arm could collide with.
The dingo_manipulation package includes additional documentation for customizing the moveit configuration
for the arm: https://github.com/dingo-cpr/dingo_manipulation