Basic Mapping & Navigation with Boxer
Note
Boxer includes the latest autonomy software from Otto, including Fleet Manager.
Please refer to Otto Motors’ documentation and the Otto 100 user manual for details on how to use Otto’s advanced autonomy software
This page explains how to use basic navigation demos with Boxer. These examples can be used with Simulating Boxer or with the physical robot. Note that if you are using the physical Boxer you also have access to the much more advanced Otto autonomy software.
Before following this tutorial, make sure you have installed the Boxer Navigation package:
sudo apt-get install ros-noetic-boxer-navigation
This section explains how to use three different navigation modes for Boxer.
Navigating in an odometric frame without a map,
Creating a map using gmapping
Localization in a known map using amcl.
If you are working in a simulation, bring up Boxer using the following command:
roslaunch boxer_gazebo boxer_race.launch
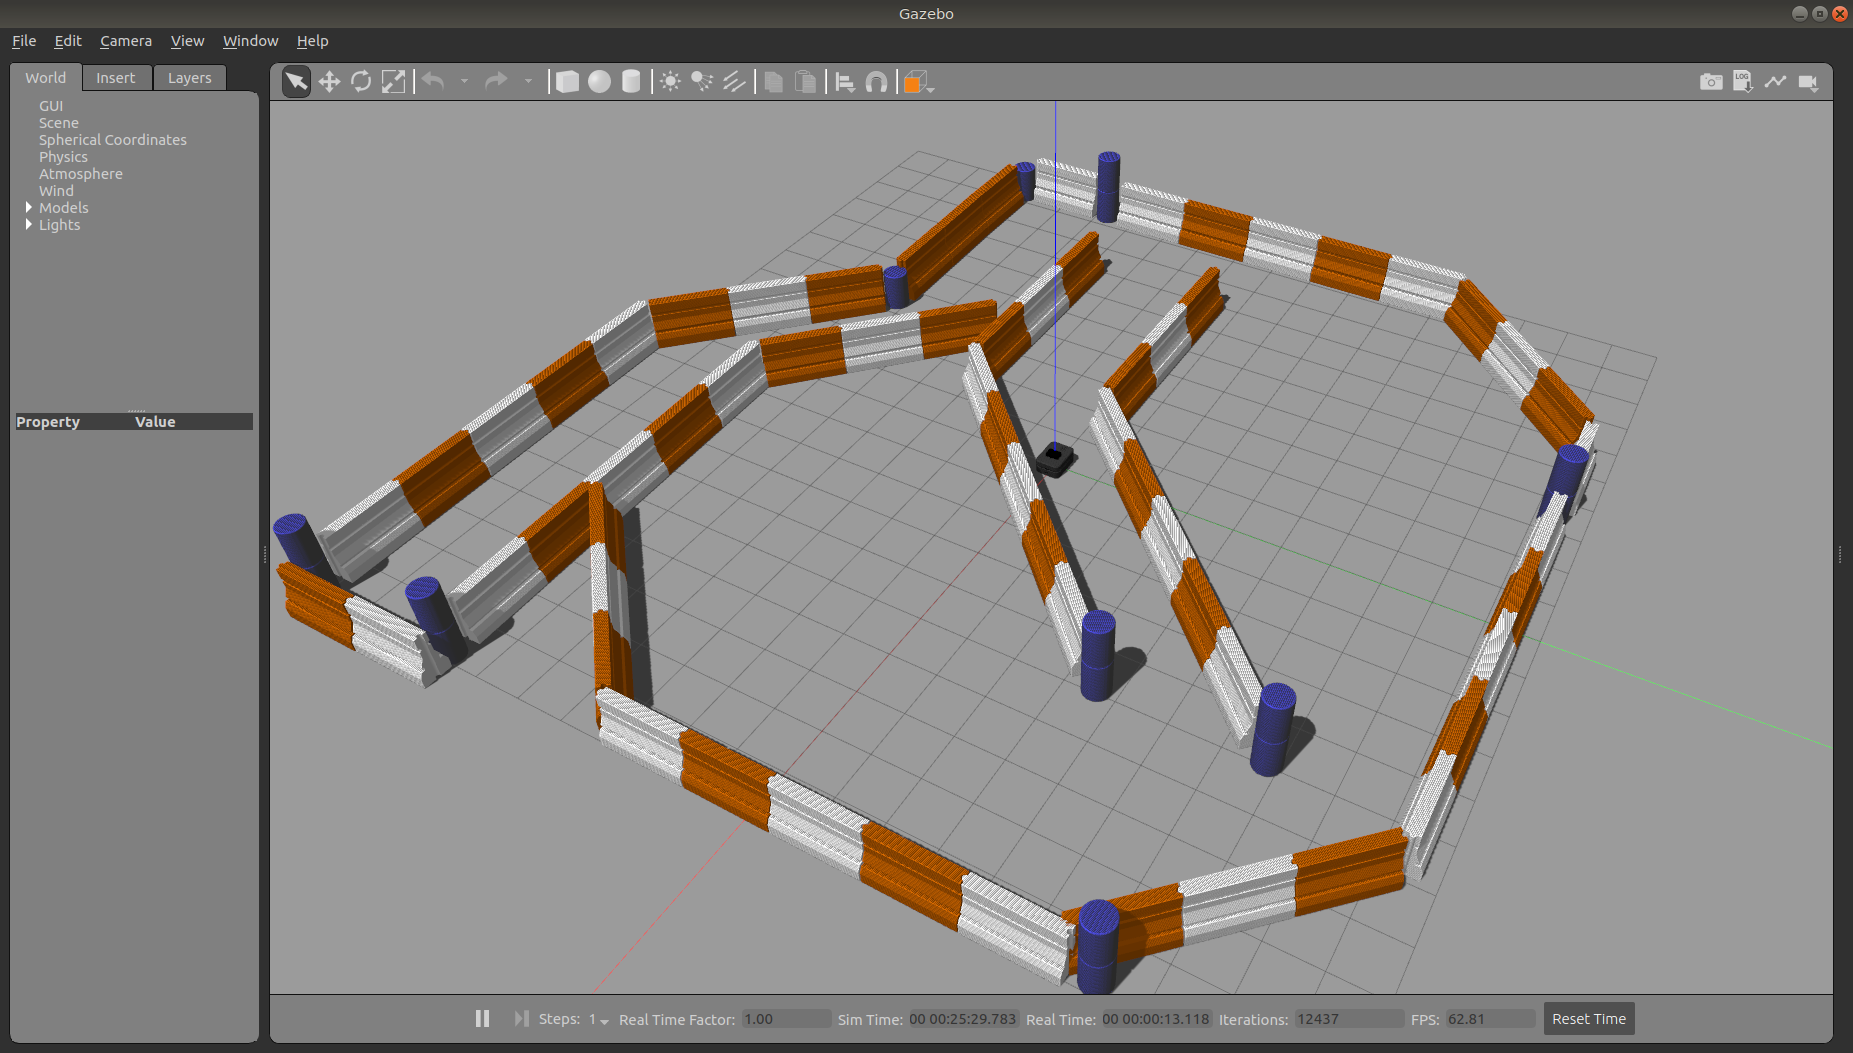
This will spawn Boxer in a relatively enclosed environment
If you are instead working with a real robot, we suggest connecting to the robot wirelessly over SSH and launching the ROS launchfiles from onboard the robot. Be sure to configure Boxer’s network appropriately to allow bi-directional communication with the robot’s ROScore.
Navigating Without a Map
In the odometry navigation demo Boxer attempts to reach a given goal in the world within a user-specified tolerance. The 2D navigation, generated by move_base, takes in information from odometry, laser scanner, and a goal pose and outputs safe velocity commands. In this demo the configuration of move_base is set for navigation without a map in an odometric frame (that is, without reference to a map).
To launch the navigation demo, run:
roslaunch boxer_navigation odom_navigation_demo.launch
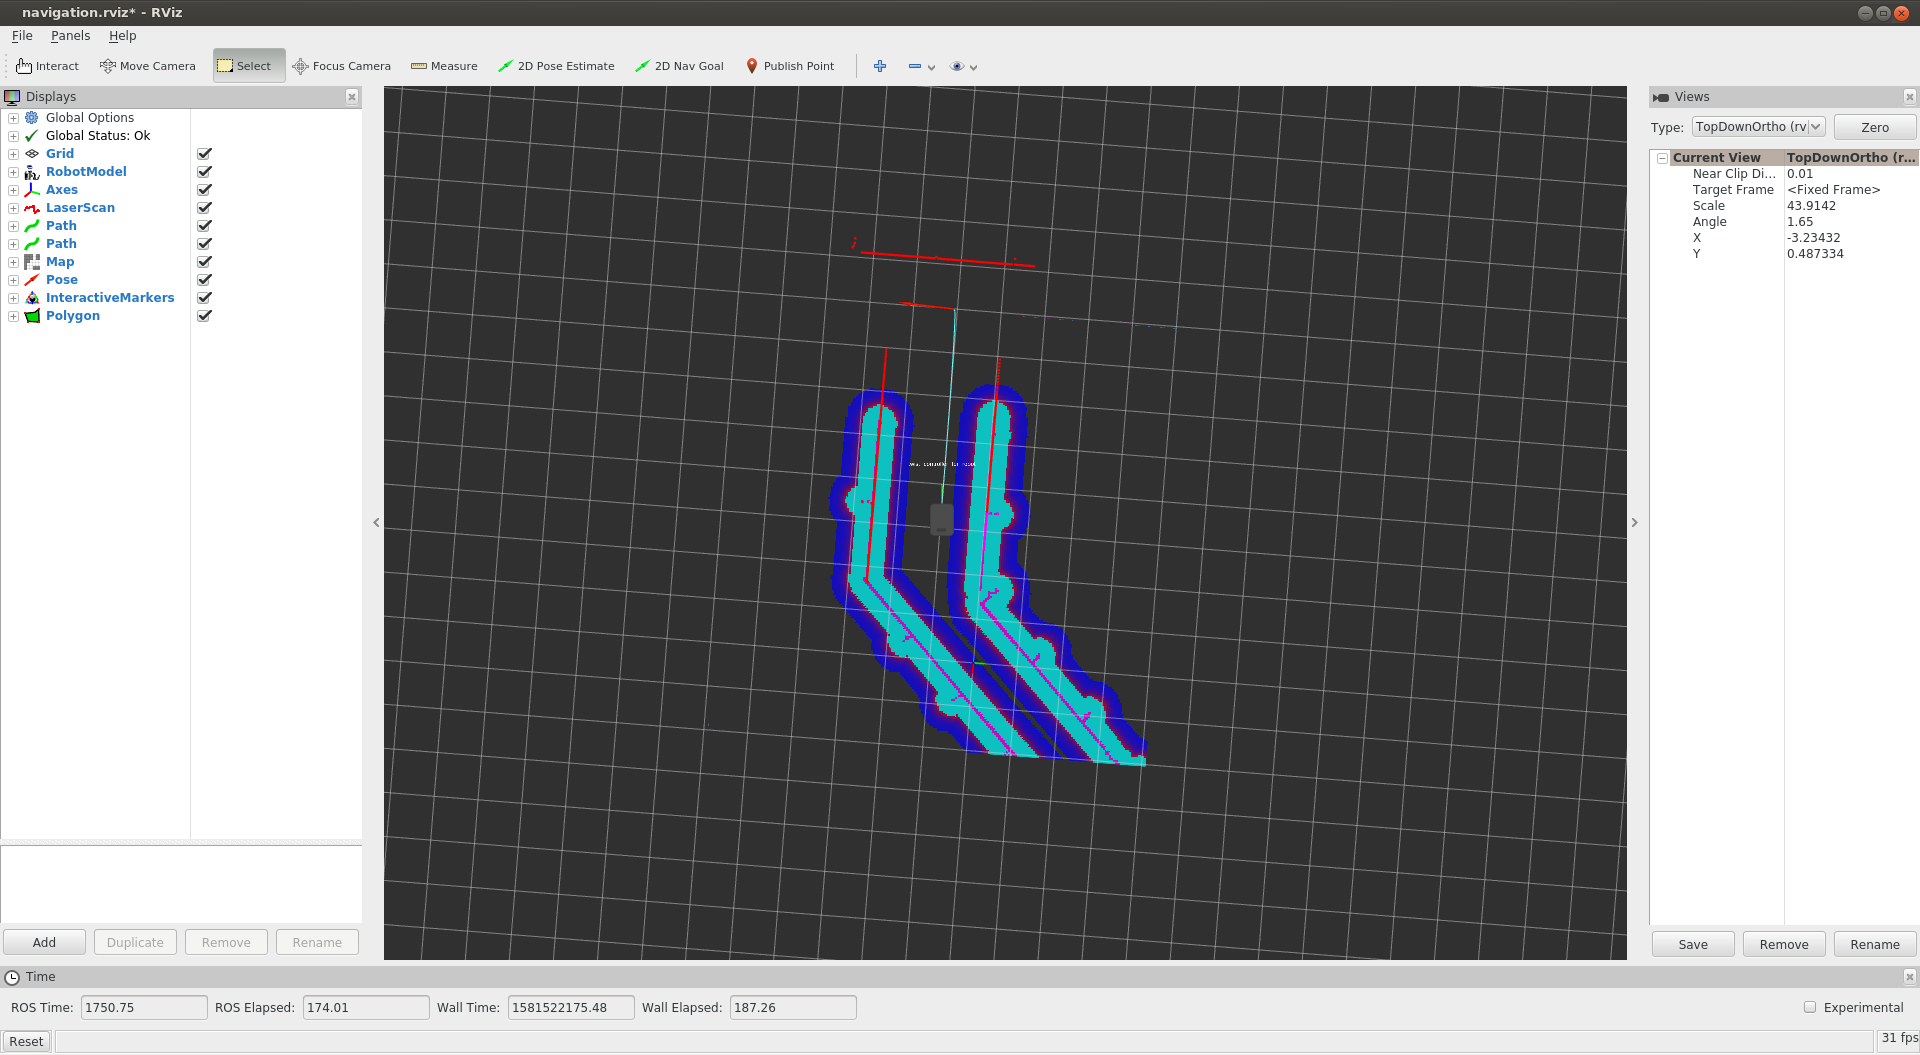
To visualize with the suggested rviz configuration launch:
roslaunch boxer_viz view_robot.launch config:=navigation
To send goals to the robot, select the 2D Nav Goal tool from the top toolbar in rviz, and then click anywhere in the rviz view to set the position. When placing the 2D Nav Goal you may also click and hold to set the goal orientation as well as the location.
If you wish to customize the parameters of move_base, local costmap, global costmap and base_local_planner, clone boxer_navigation into your own workspace and modify the corresponding files in the params subfolder.
Creating a Map with Gmapping
Gmapping is an open-source tool for Simultaneous Localization And Mapping, or SLAM. SLAM allows a robot to build a map of its environment while exploring, making it helpful when the robot is in unfaimilar environments.
This section explains how to produce a map using gmapping. We will then use this map to set 2D nav goals in the following section.
To begin, run the following command:
roslaunch boxer_navigation gmapping.launch
In a second terminal, run the following command:
Note
If you are driving a simulated Boxer you may find it easyer to launch rviz without the gmapping configuration:
roslaunch boxer_viz view_robot.launch
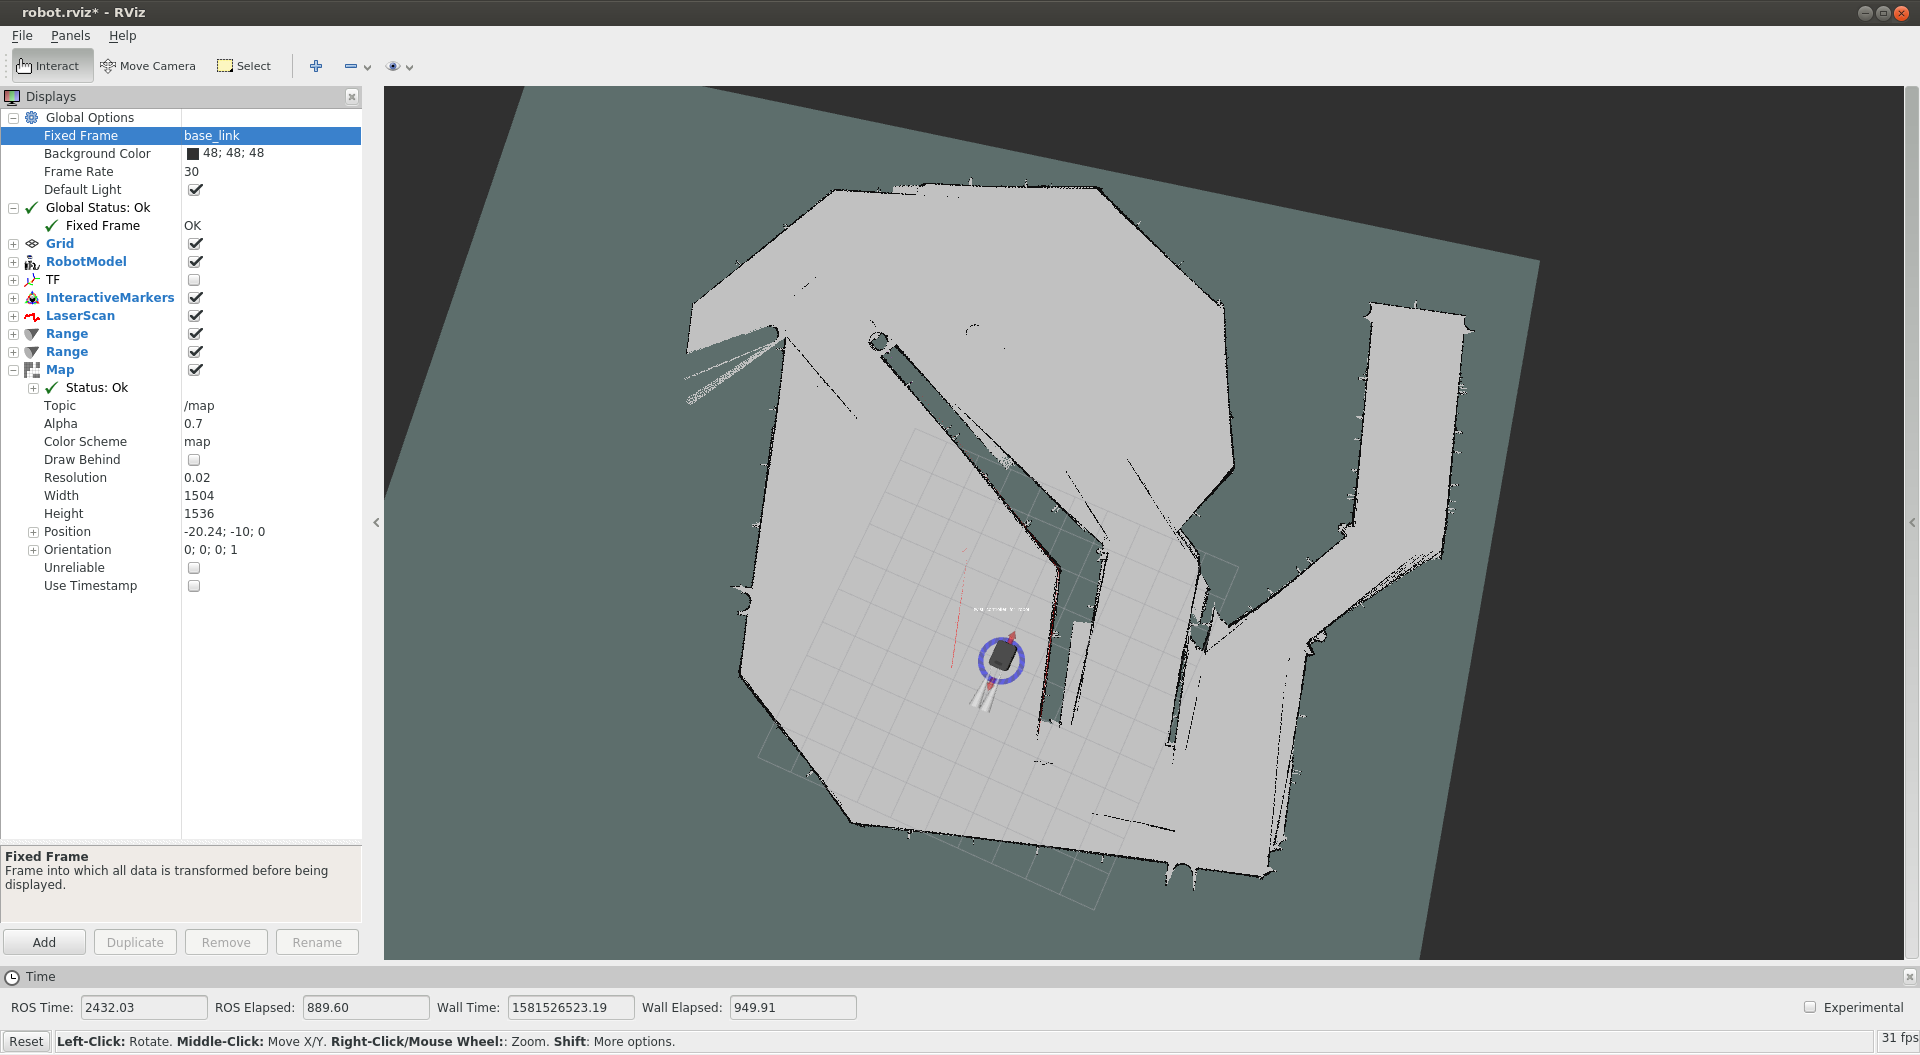
Now slowly drive the robot around to produce a map. If you are driving the robot using the interactive controls in
rviz you may find it helpful to change the visulaization’s fixed frame from map or odom to base_link. Doing
so will keep the robot in a fixed position in the window, while the world rotates around the robot.
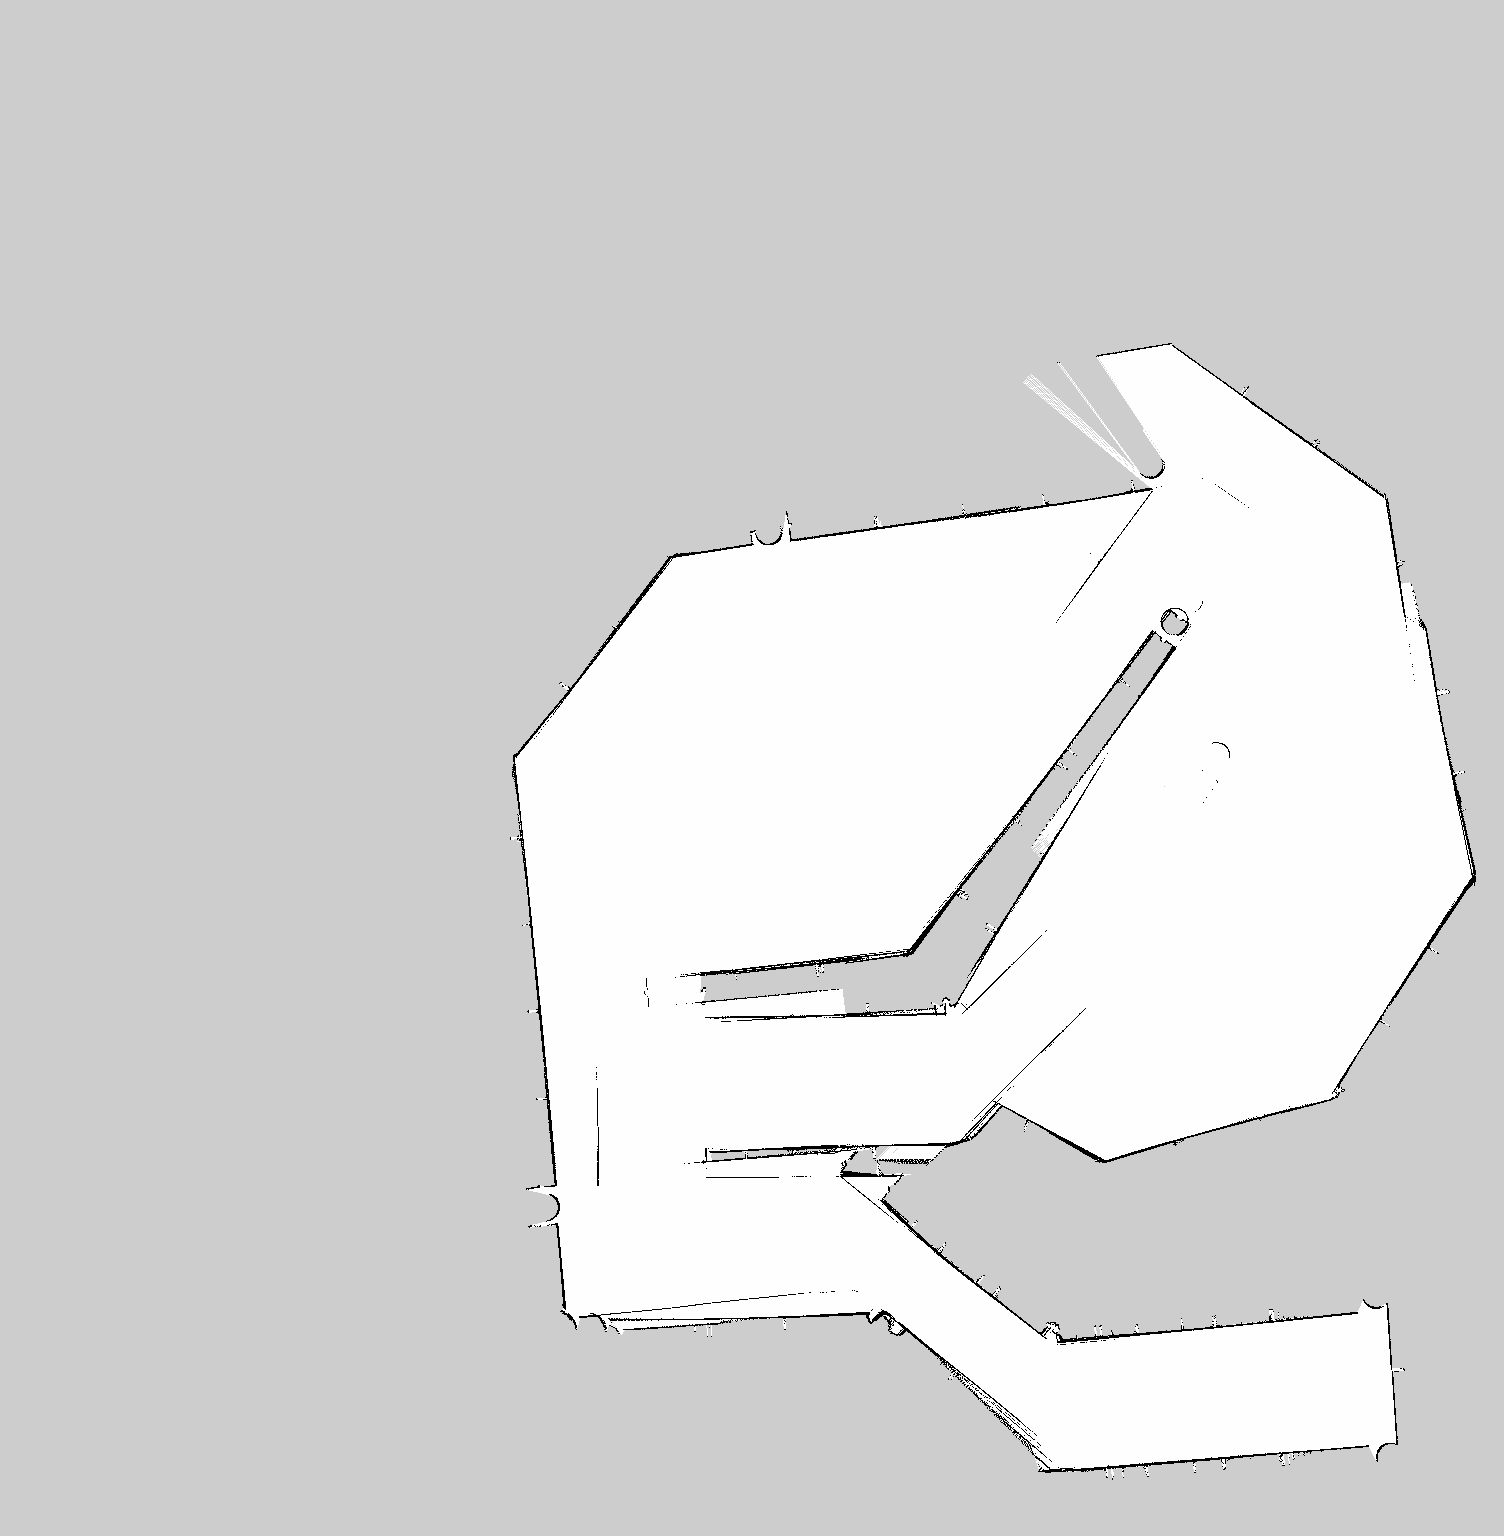
When you are satisfied that you have adequately mapped the area, you can run the following command to save the map using map_saver:
rosrun map_server map_saver -f mymap
This will create a mymap.yaml and mymap.pgm file in your current directory.
The resulting map should look something like this:
Advanced
If you have an application which requires faster or more accurate SLAM capabilities, our commercial offerings may be a good fit for your team. Please get in touch for more details.