Network Setup
The primary requirement for getting your TurtleBot running is connecting to a network so that you can operate it remotely.You can use the Network Manager in the upper right corner of your screen to connect to a WiFi network. After the network is started, it is time to set your ROS_MASTER_URI and ROS_HOSTNAME. The ROS_MASTER_URI tells the rest of the nodes at which address they can find the ROS master .
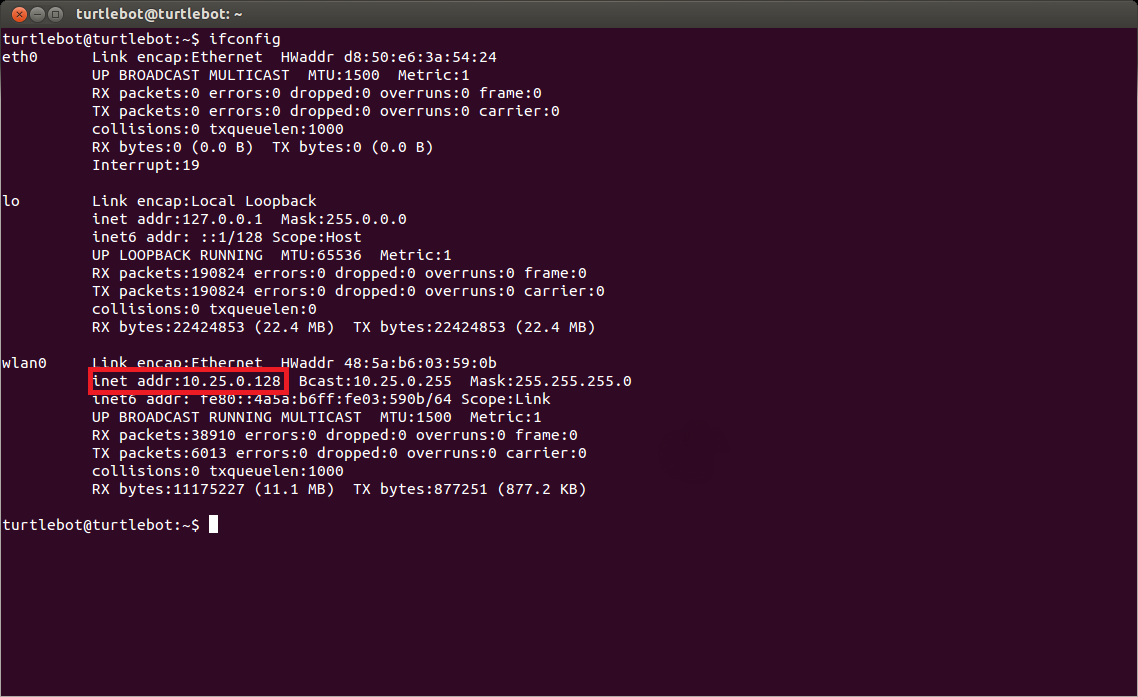
The TurtleBot netbook will be setup to run as the ROS master. Before this is done, you will need to determine the IP address of your TurtleBot netbook. This can be found by typing “ifconfig” in a terminal. Your IP address will be under wlan0, and it’s the numbers proceeding “inet addr:”.
Once you have your IP address, set the TurtleBot netbook as the ROS master by typing the following lines in a terminal on your TurtleBot netbook, where IP_OF_TURTLEBOT is the IP address of the TurtleBot netbook.
$ echo export ROS_MASTER_URI=http://IP_OF_TURTLEBOT:11311 >> ~/.bashrc
$ echo export ROS_HOSTNAME=IP_OF_TURTLEBOT >> ~/.bashrc
For ROS to operate you need to have an instance of roscore running on the master. Type the following in a terminal on your TurtleBot netbook:
$ roscore
Now that your TurtleBot netbook is set up, the instructions to setup another computer running ROS as a remote workstation can be found here (you can skip step 3). These commands will add the export lines to your bashrc file so they will run on every new terminal instance. However, if the IP address of either the TurtleBot netbook or your workstation happens to change, you can edit these files by typing gedit ~/.bashrc and inputting your new IP address.
Install the libuvc_camera package by running sudo apt-get install ros-kinetic-libuvc_camera.