Keeping Warthog Updated
Note
If you are upgrading your Warthog from an older version of ROS, please refer to our upgrade instructions here.
Warthog is always being improved, both its own software and the many community ROS packages upon which it depends! You can use the apt package management system to receive new versions all software running on the platform.
Getting New Packages
Each Warthog leaves the factory already configured to pull packages from http://packages.ros.org as well as http://packages.clearpathrobotics.com. To update your package and download new package versions make sure that Warthog is connected to the internet and run the following commands:
sudo apt-get update
sudo apt-get dist-upgrade
If you see any errors, please get in touch and we’ll see if we can get you sorted out.
MCU Firmware Update
Warning
Accessing Warthog’s MCU requires access to several hard-to-get-to parts of the robot. Unless absolutely necessary, we do not recommend re-flashing the robot’s MCU firmware.
You need to use an external PC to update Warthog’s MCU firmware. You cannot use Warthog’s internal PC, as installing the firmware requires power-cycling the MCU. Warthog’s MCU controls the power supply to the internal PC. These instructions assume the external PC is running some flavour of Linux with access to Clearpath’s ROS packages.
Follow the below procedure to flash the firmware to Warthog’s MCU:
Place Warthog up on blocks and/or engage the emergency stop by pressing one of the red buttons located on each corner of the robot. Firmware loading does not usually result in unintended motion, but it’s safest to ensure the robot cannot move accidentally.
Download the Warthog firmware package onto your PC:
sudo apt-get install ros-melodic-warthog-firmware
Remove the top panel from the Warthog. We recommend opening the panel to the left, as there are cables that run into the lid which can be strained.
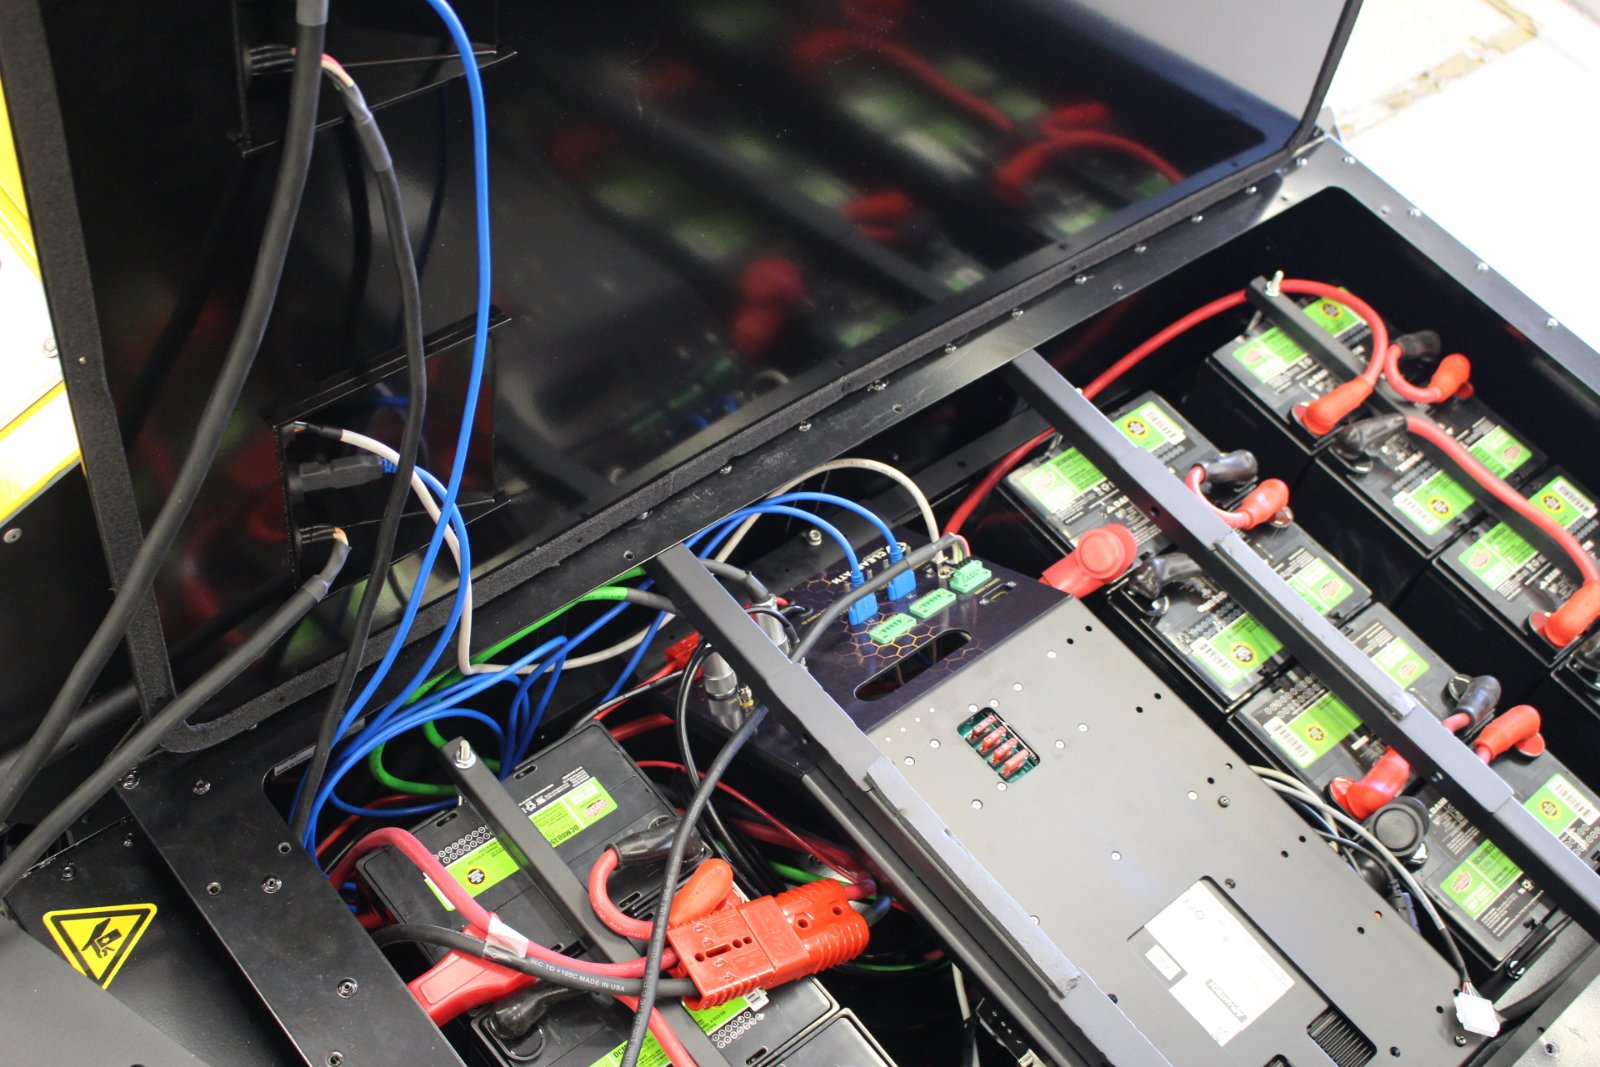
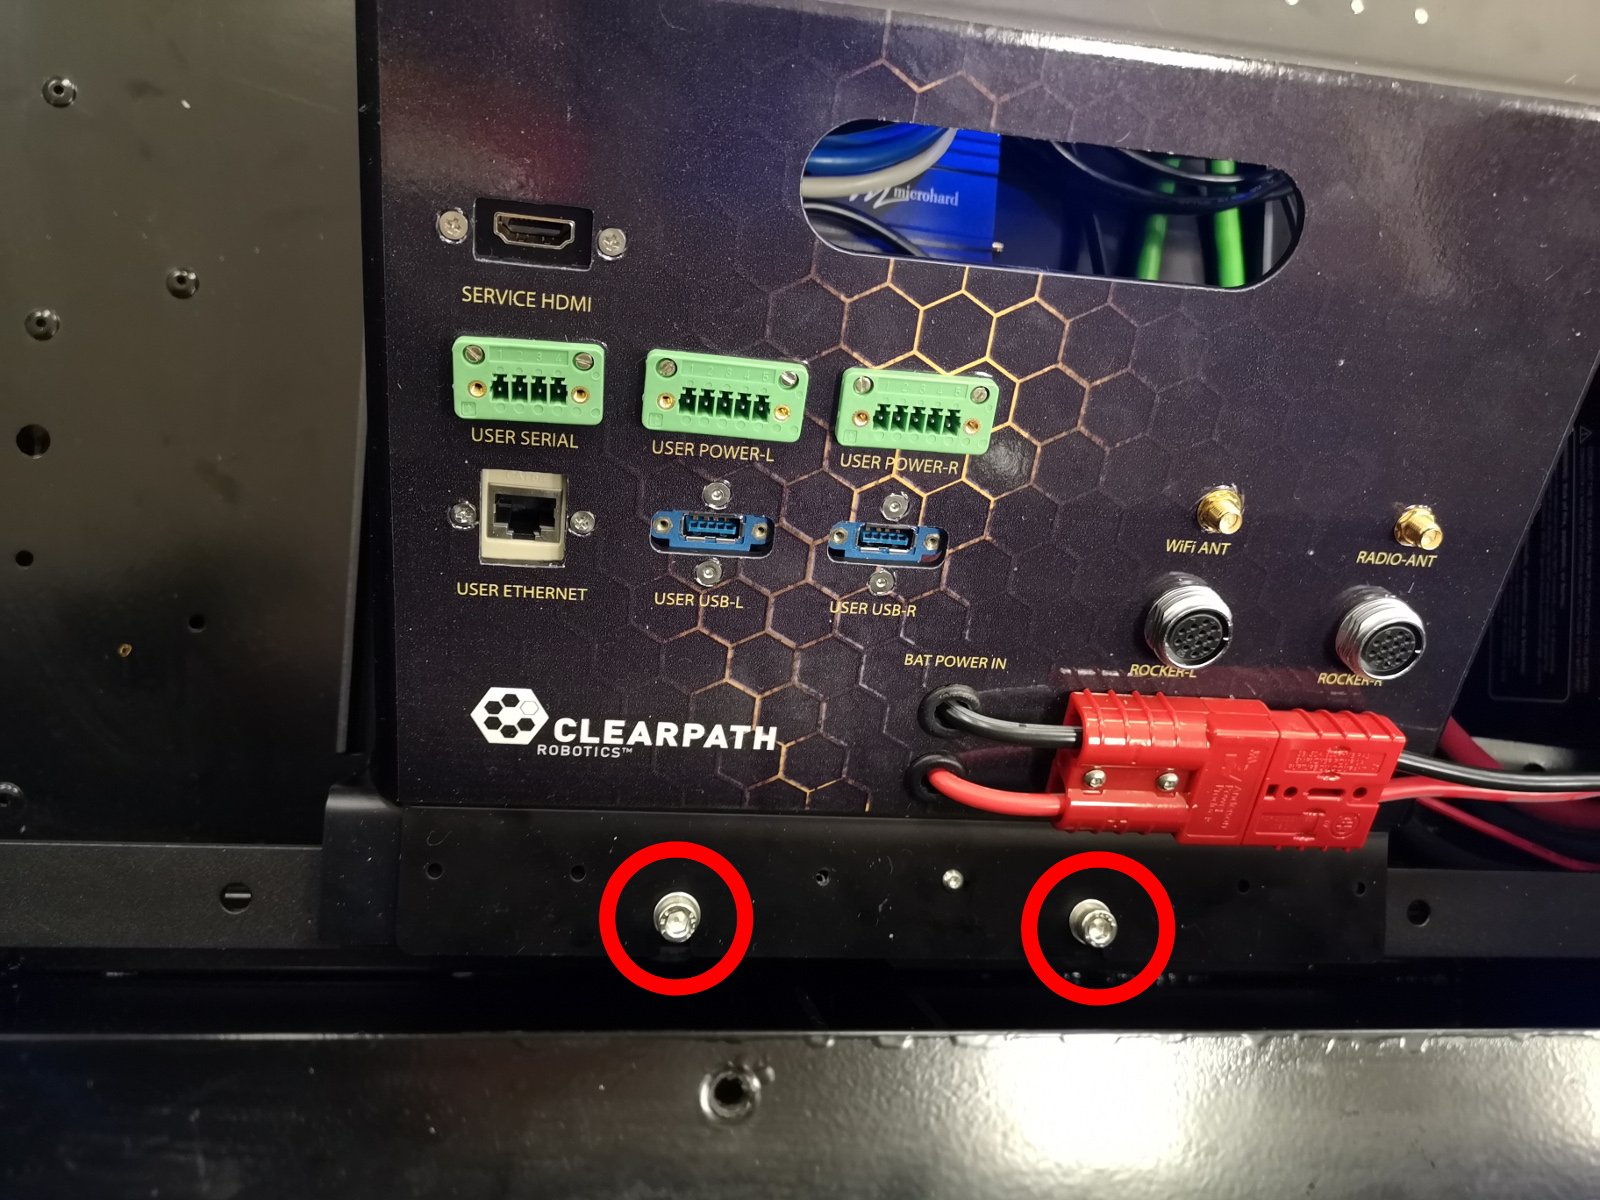
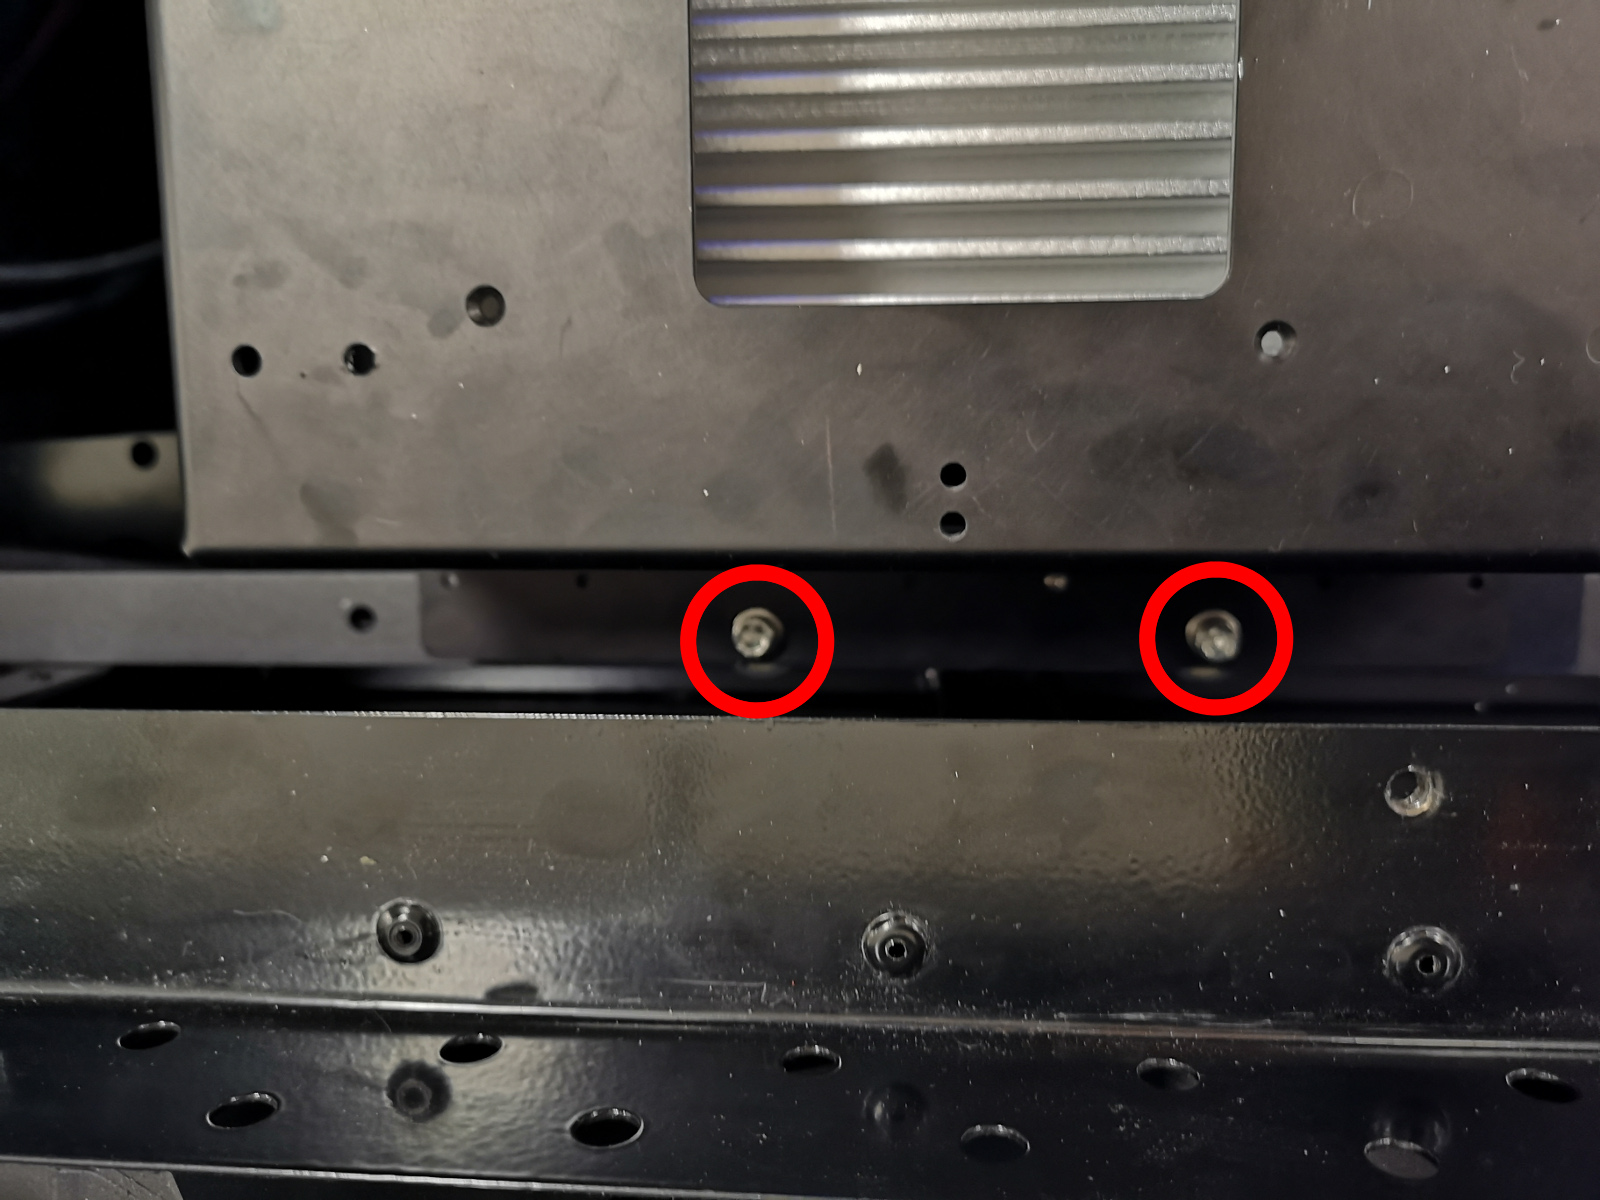
Warthog’s MCU is located on the underside of the metal frame over the top of the PC. To access it you will need to disconnect all cables from the breakout on the sloped portion on the left and then undo 4 screws anchoring the frame:
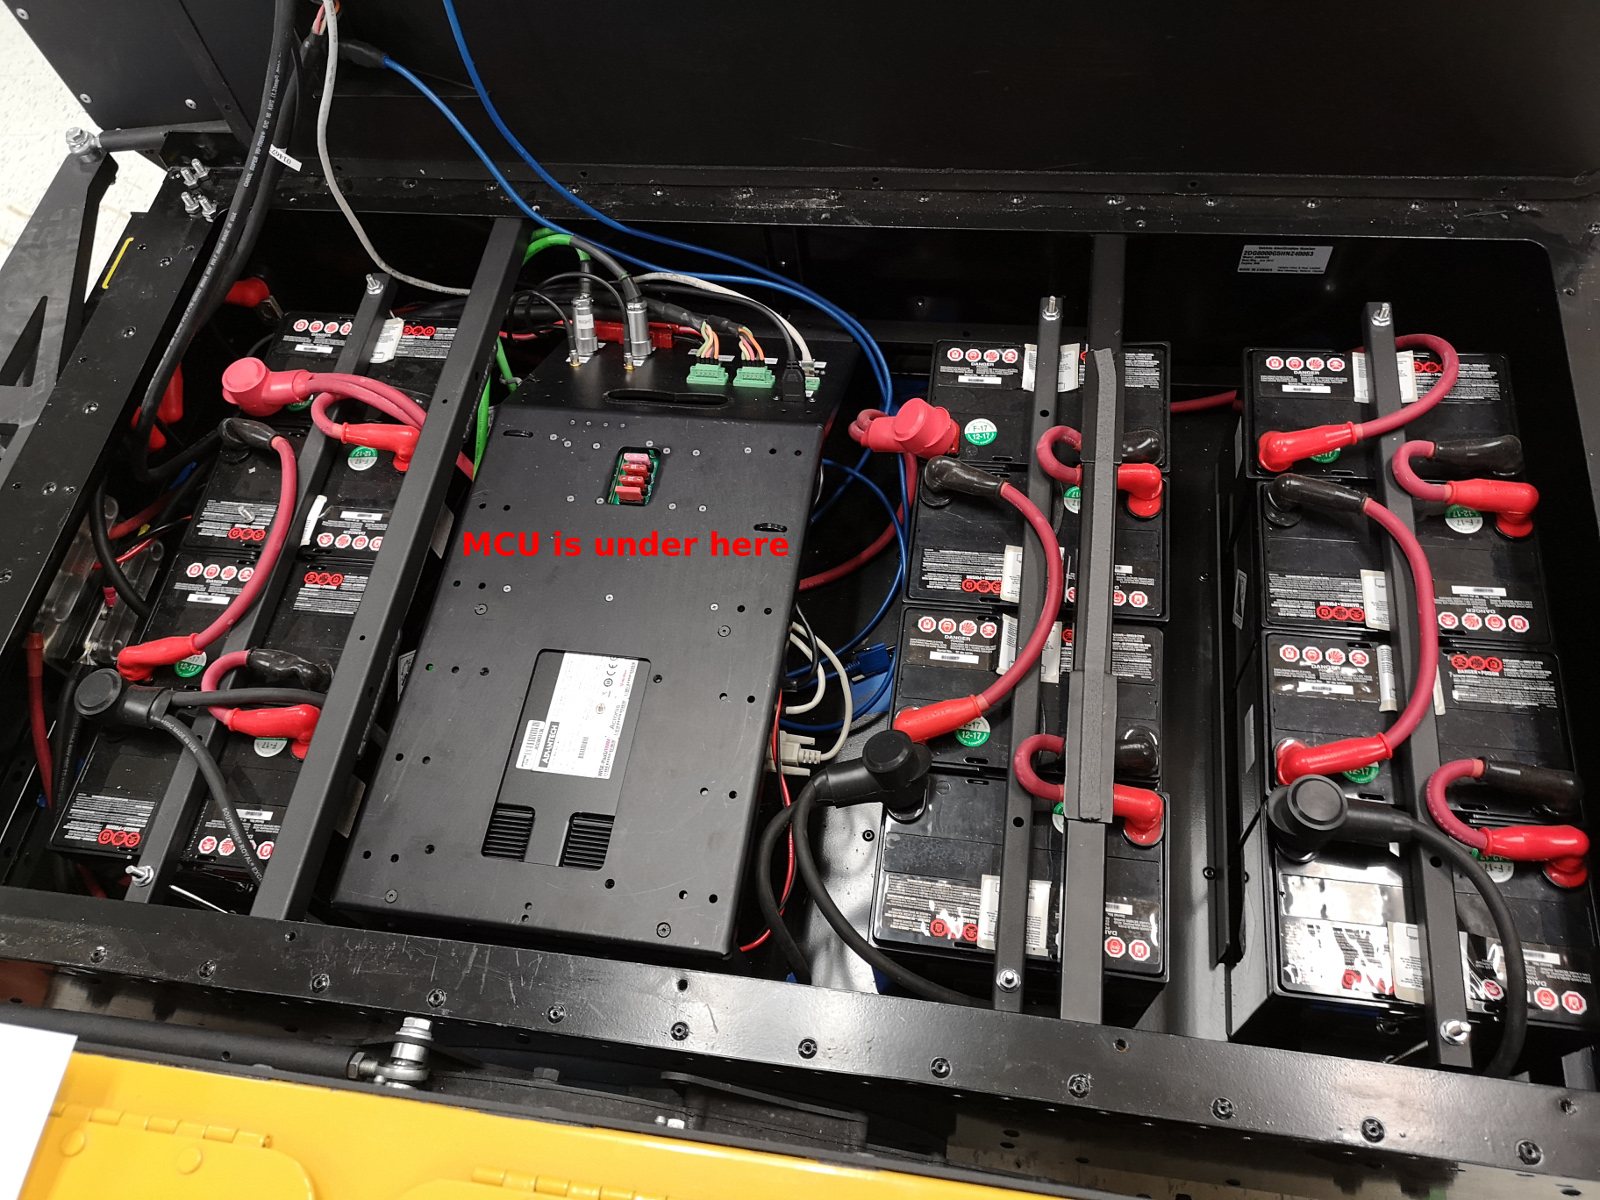
Once the screws are removed, carefully lift the center panel and turn it over to expose the MCU’s micro USB port and buttons.
While pressing
BT0on the MCU, connect the external PC to Warthog’s MCU using a USB cable.
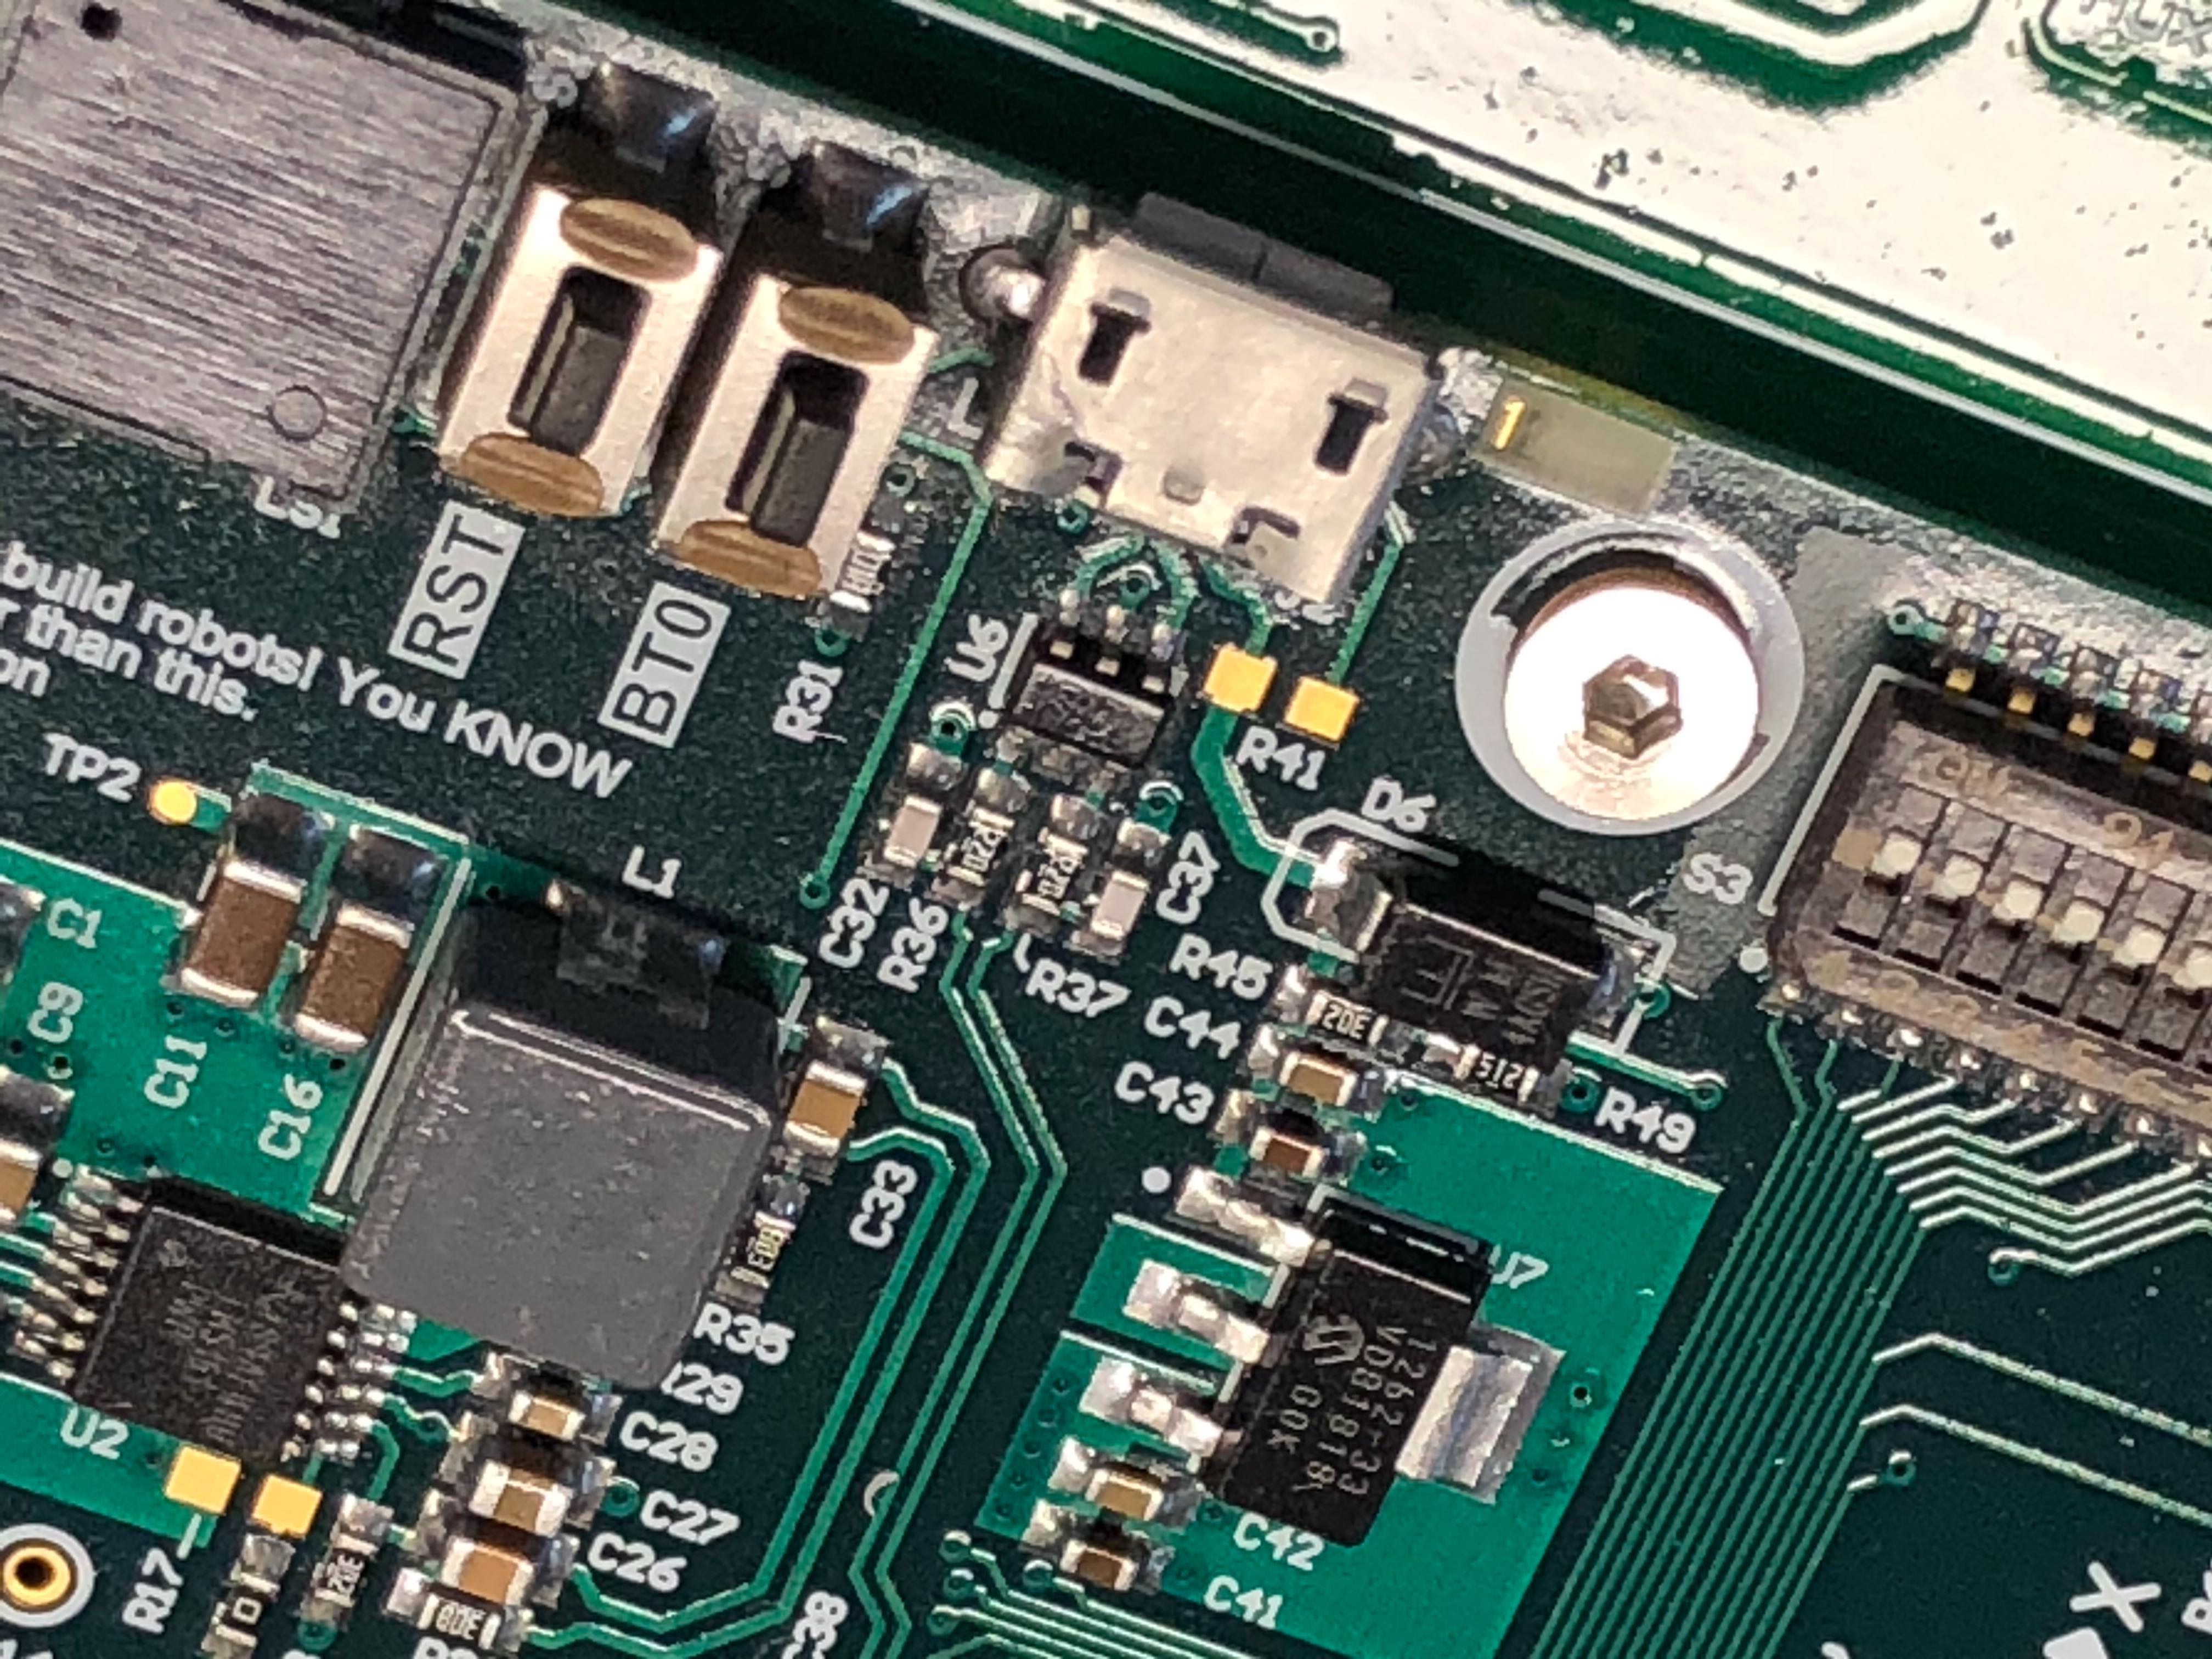
After connecting the PC you should see a device with a name similar to
Bus 001 Device 005: ID 0483:df11 STMicroelectronics STM Device in DFU Modein the output oflsusb.
Note
If the MCU does not show up as a DFU device in the output of lsusb after completing the above procedure, press
and hold BT0 on the MCU press the RST button while holding BT0 down. This will reset the MCU and force it into DFU
mode.
With the MCU in DFU mode, run the following command, replacing 001/005 with the value appropriate to the Bus and
Device where Warthog’s MCU is connected:
sudo chmod 666 /dev/bus/usb/001/005
Now run the following command to upload the firmware:
dfu-util -v -d 0483:df11 -a 0 -s 0x08000000 -D /opt/ros/melodic/share/warthog_firmware/mcu.bin
You should see about 20 seconds worth of lines output beginning with “Download from image …”. When this is complete you may disconnect the PC from the MCU and power-cycle the robot.
Starting From Scratch
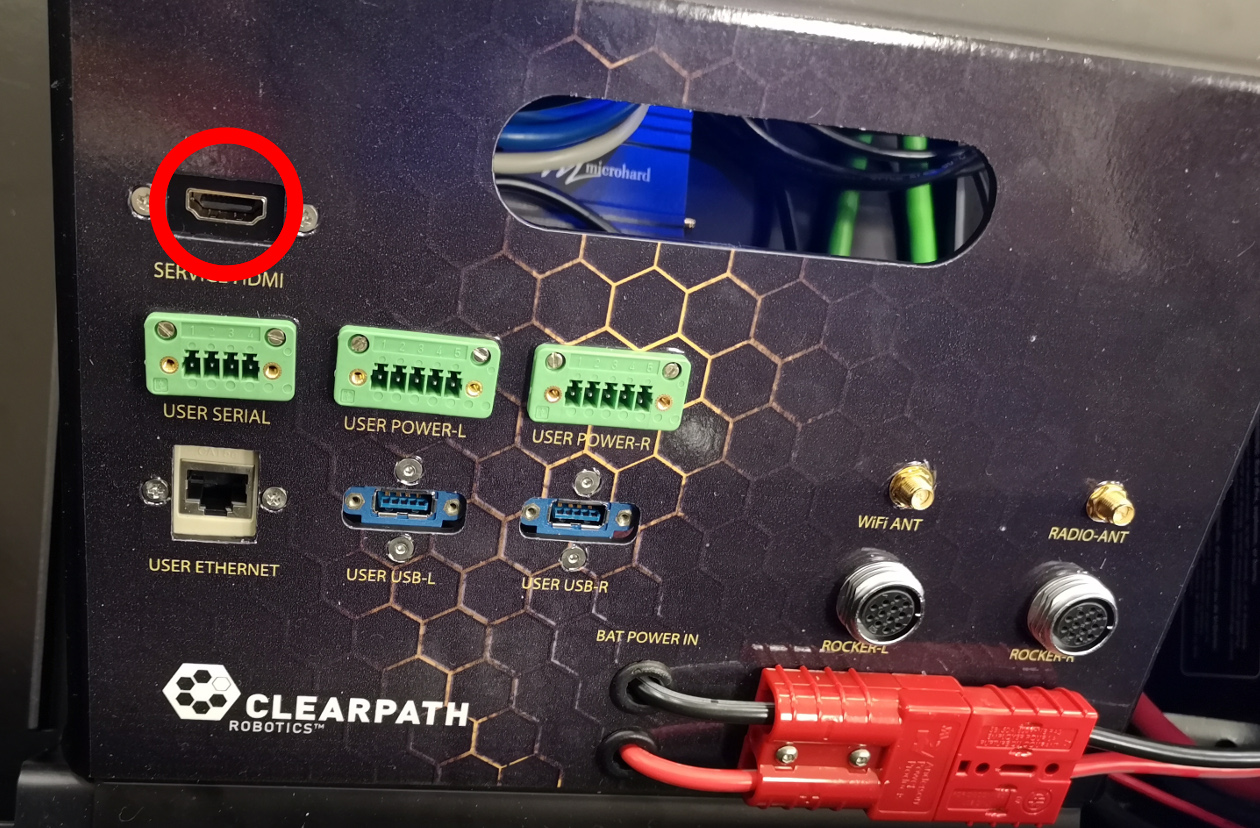
If Warthog’s computer has become inoperable, or for any reason you want to restore it to the factory state, you can reinstall the operating system to the PC. Warthog includes USB and ethernet breakouts located on the rear of the robot for easy access. However, to connect a monitor to the PC you will need to open up Warthog’s body and access the HDMI port located on the sloped portion of the center frame.
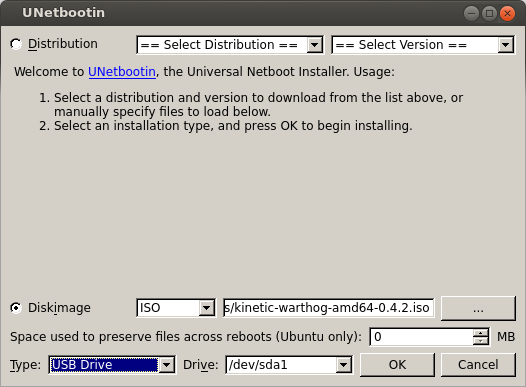
Download the latest operating system image for Warthog from https://packages.clearpathrobotics.com/stable/images/latest/
Use unetbootin or rufus (Windows only) to write the ISO image to a USB memory stick
Connect Warthog’s PC to the internet with an ethernet cable. Also connect a monitor, mouse, and keyboard to the PC.
Connect Warthog to shore power to ensure it does not power down while the OS is installing. This is optional, but recommended.
Insert the USB drive into one of the Warthog’s PC’s USB ports and power-cycle the PC. You should see a purple Debian/Ubuntu installer. The installer will run by itself and power off the PC when finished. If you do
Remove the USB drive and power on the PC.
Log into Warthog. The username is
administratorand the password isclearpathInstall Warthog’s robot_upstart job, so that ROS will launch each time the robot starts:
You can now configure Warthog to connect to your wi-fi.